Education Changes Fate? - Photographic Collage, 18 cm x 51 cm
Conceptualization
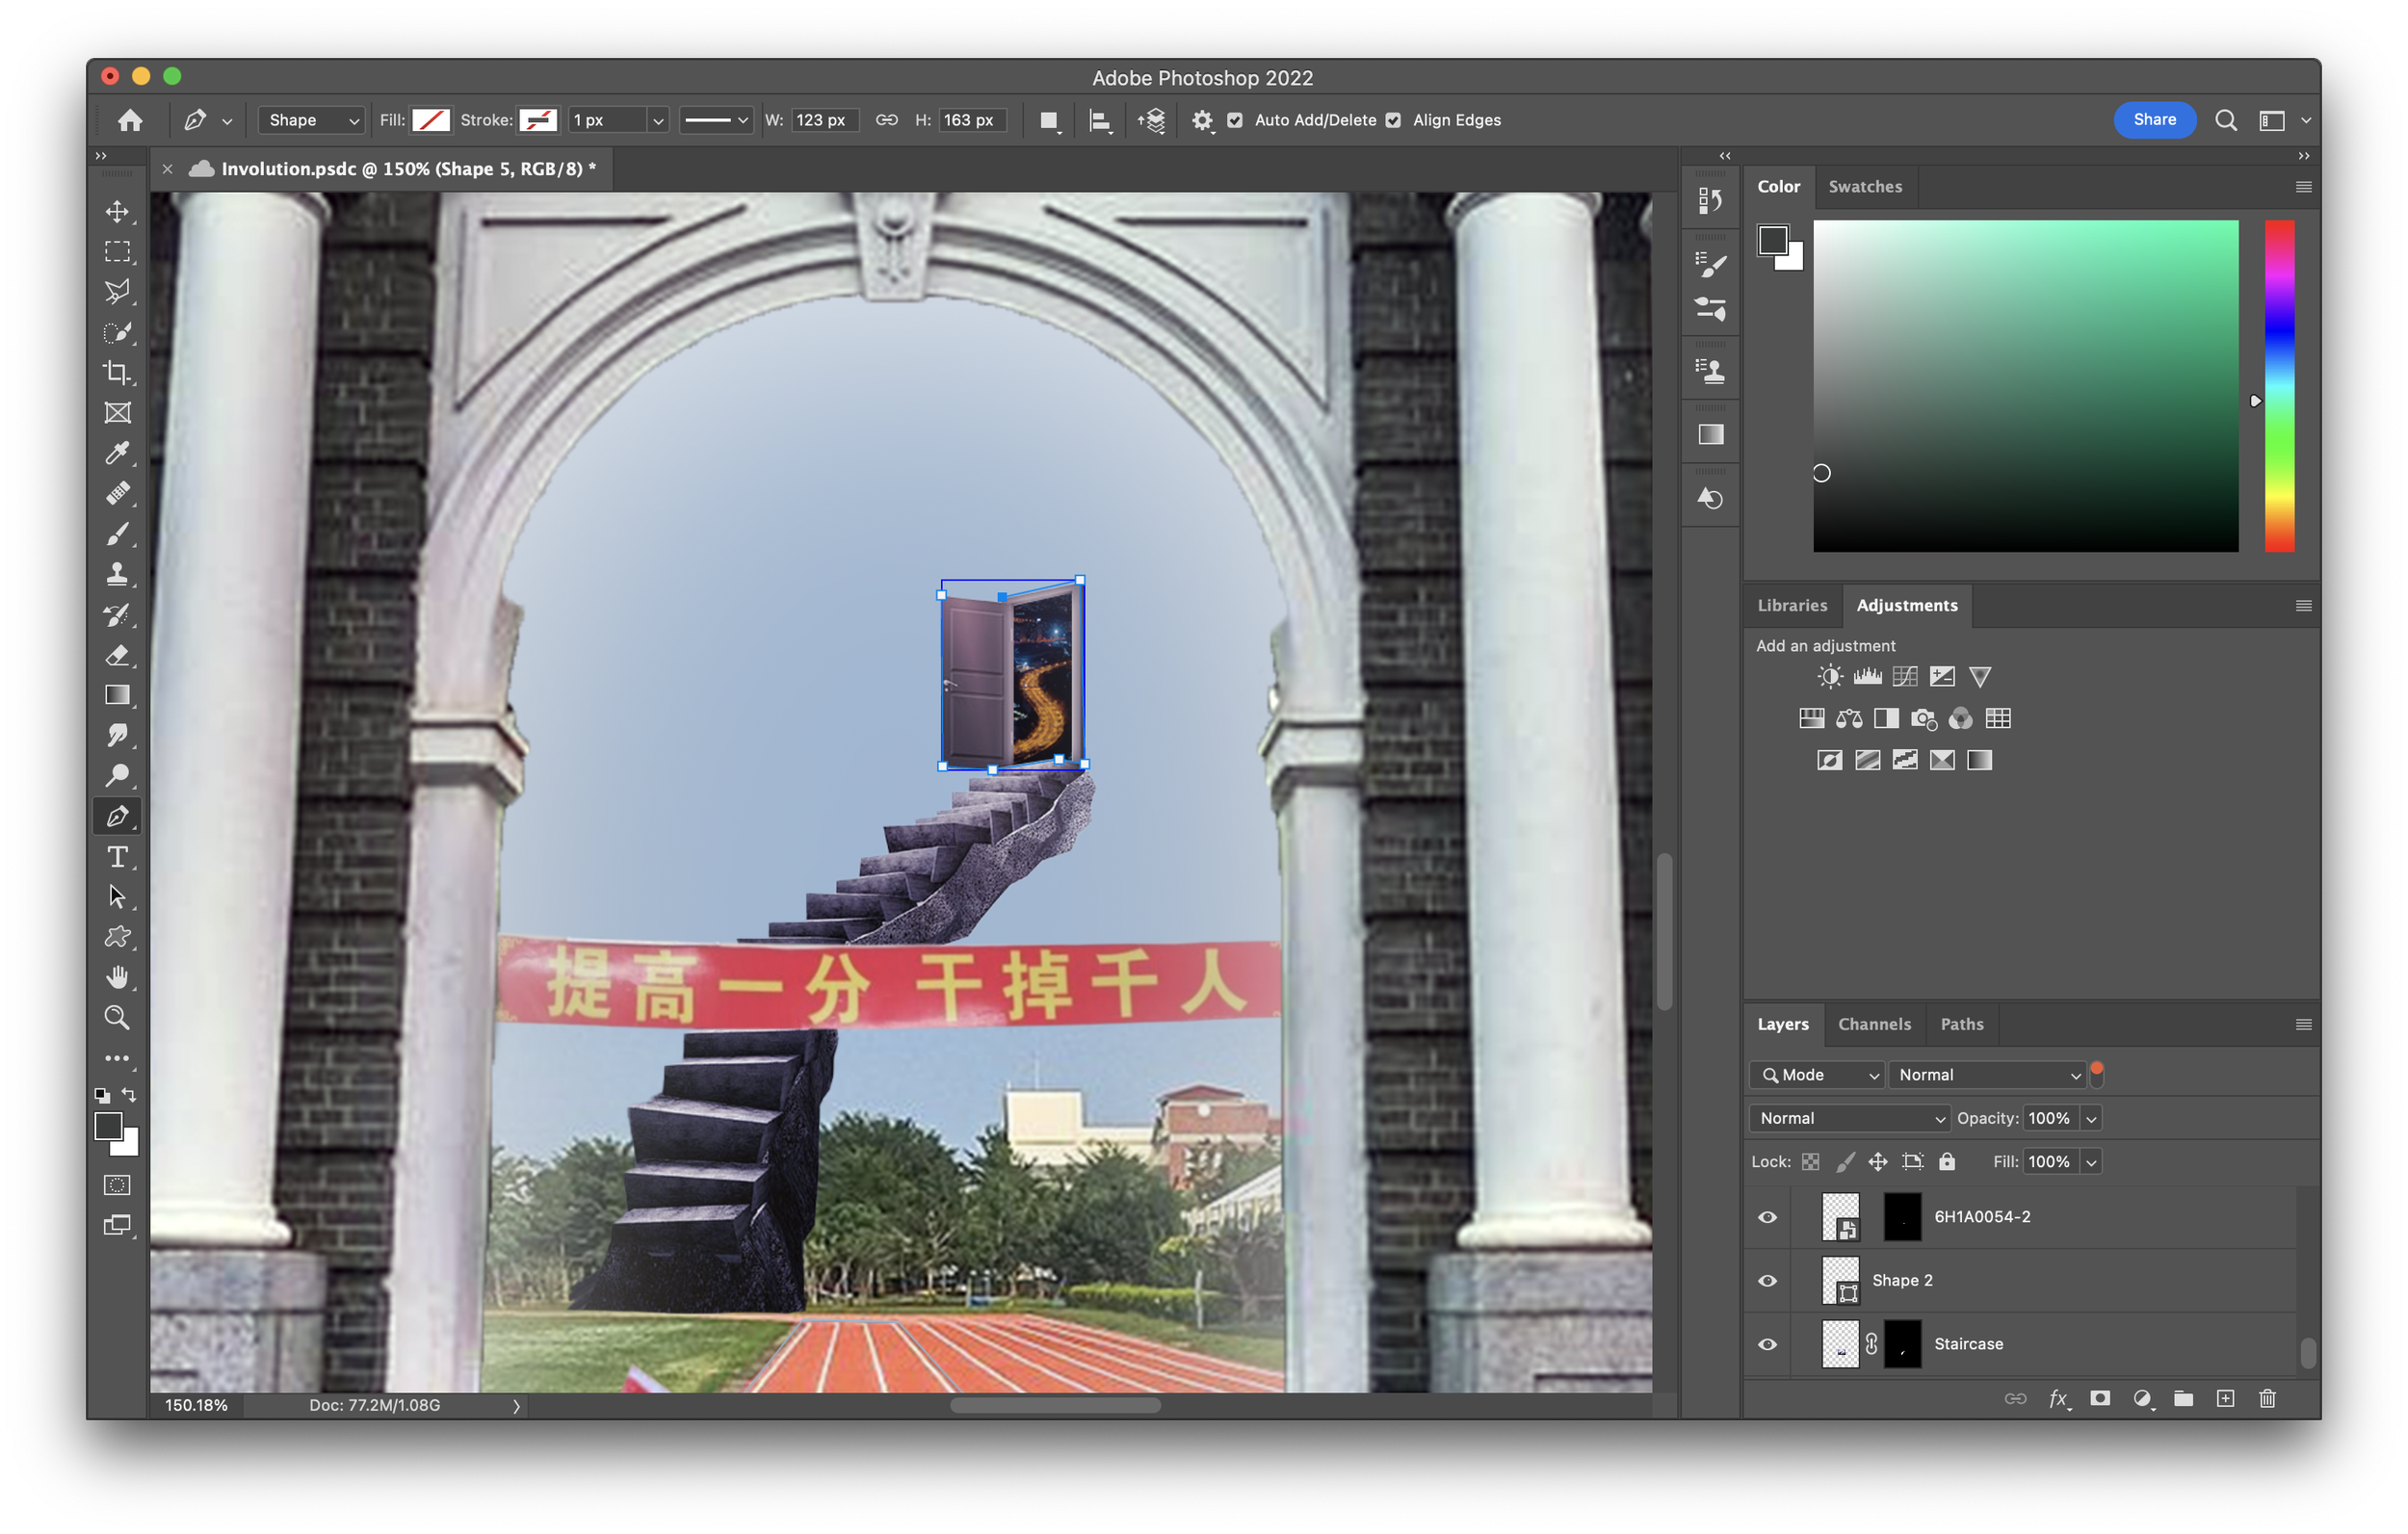
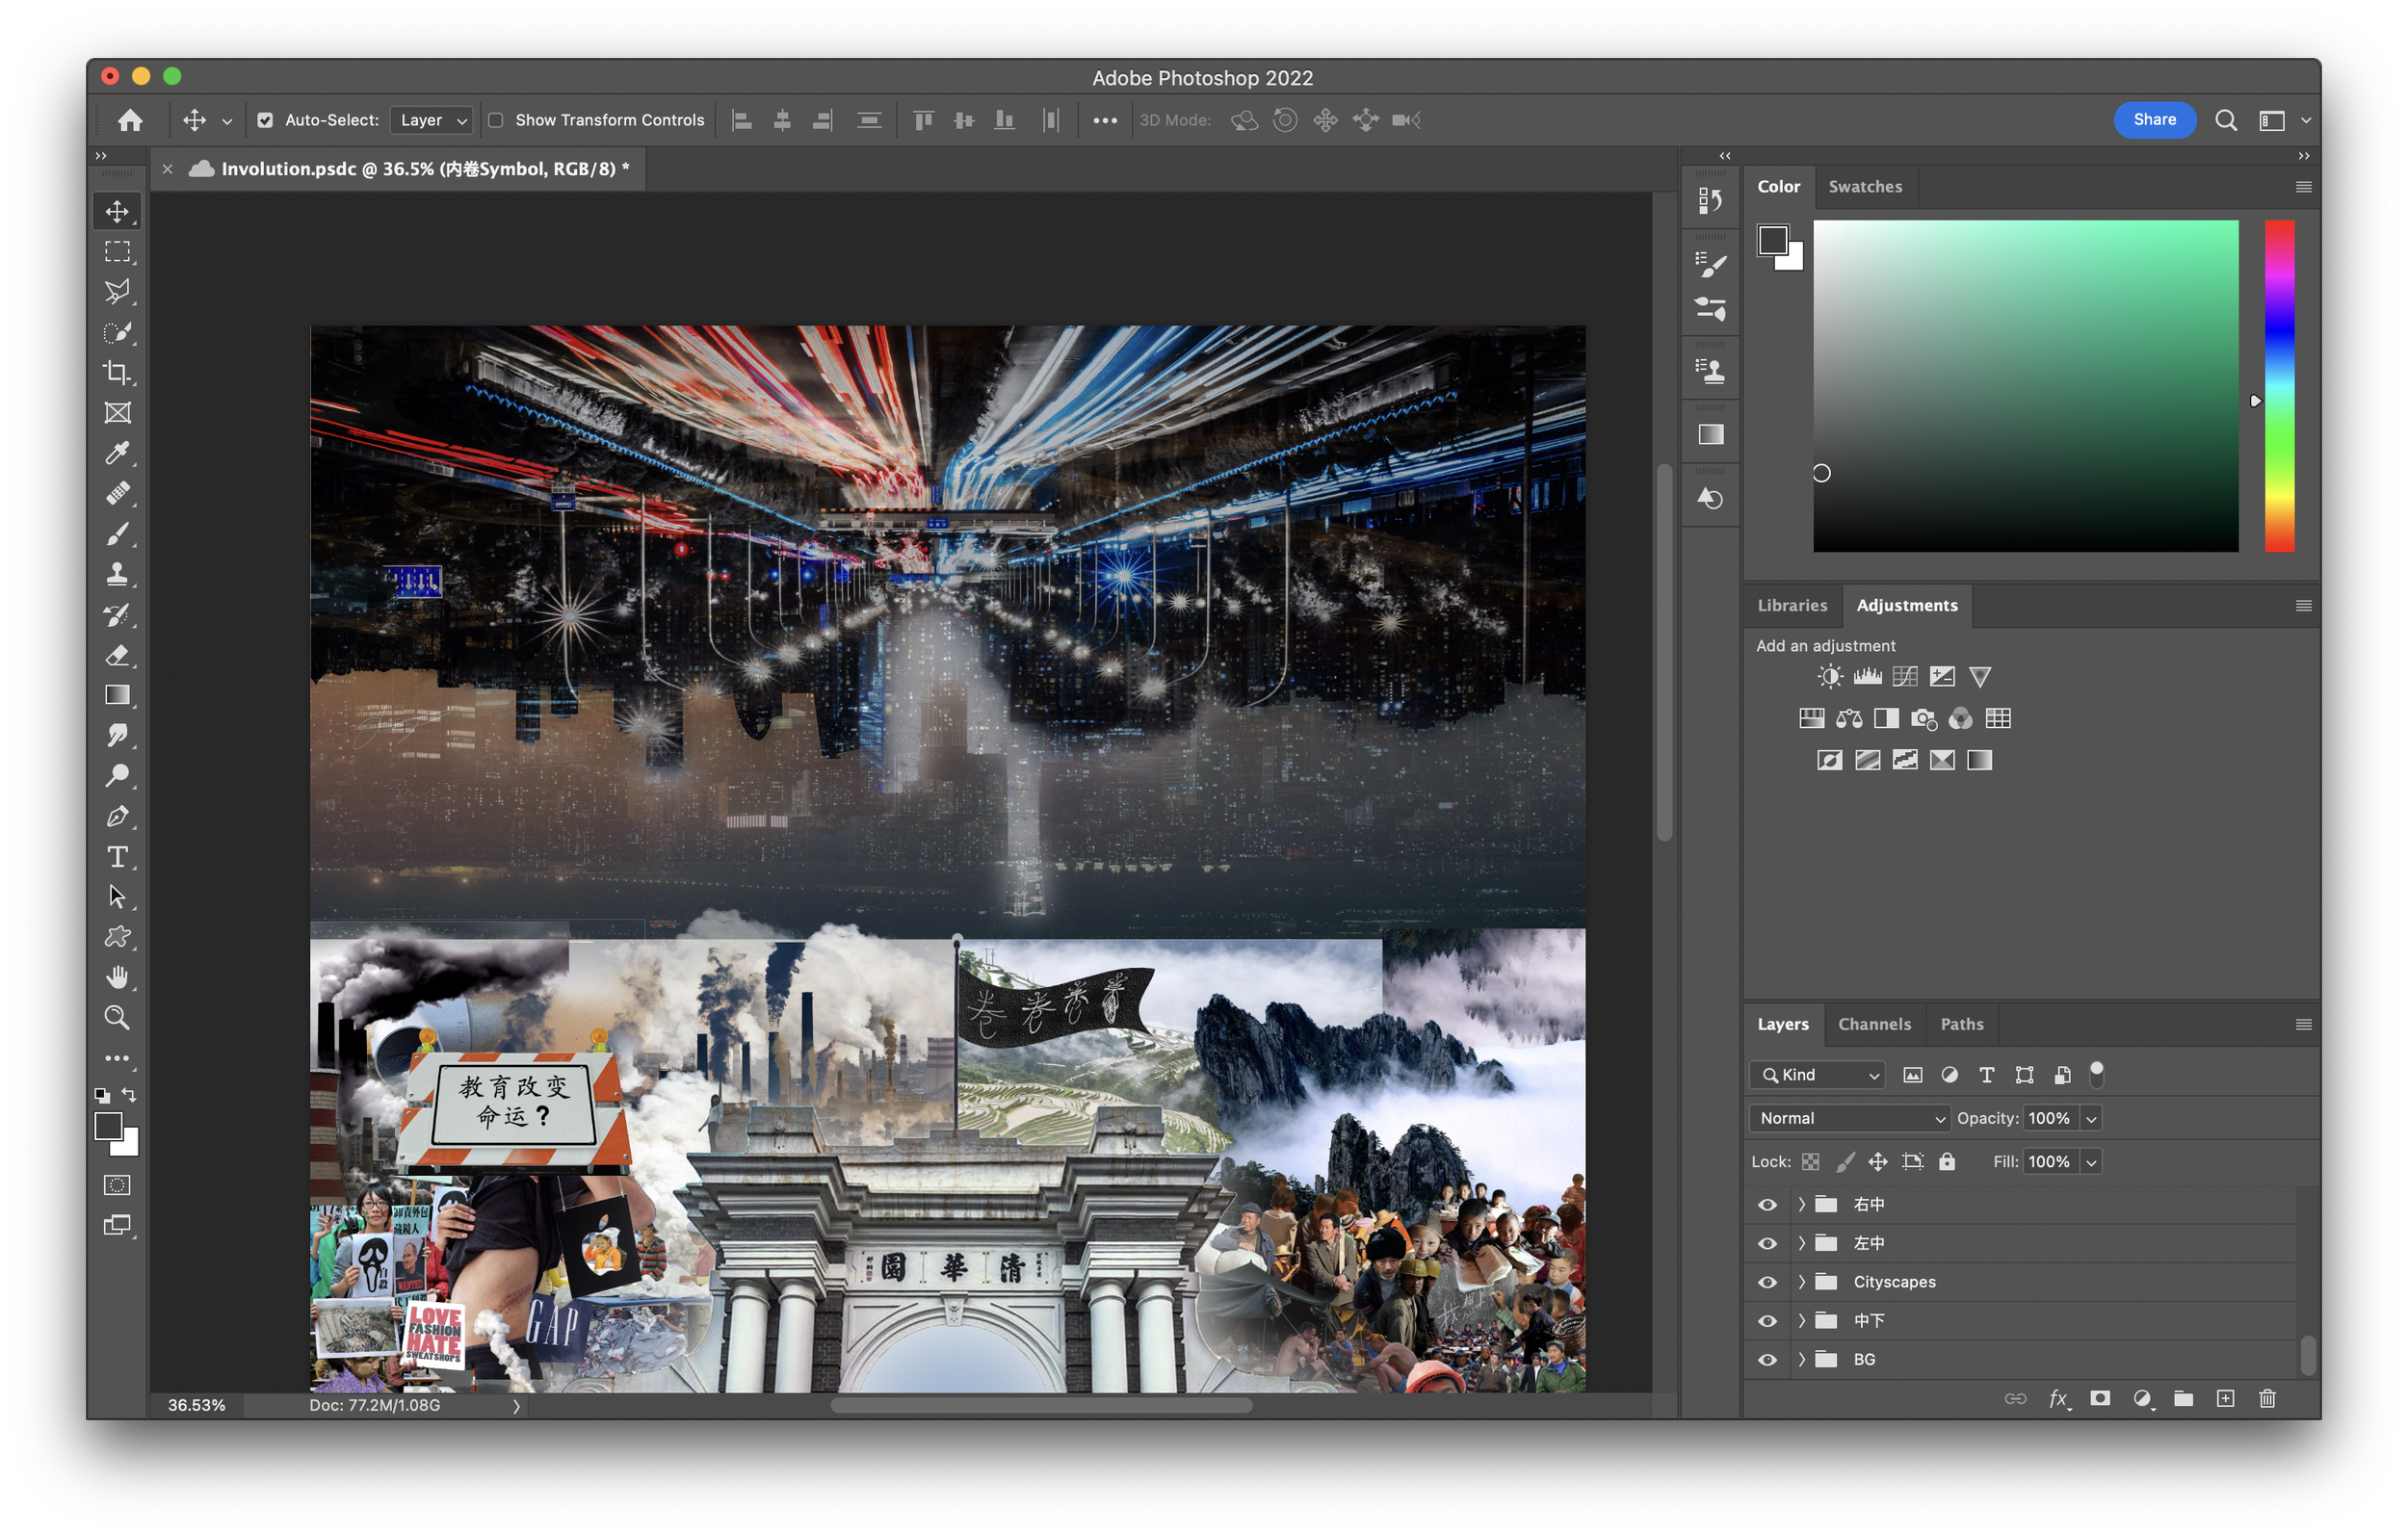
The first step toward creating a photographic collage is to think about the why. Why do you want to take advantage of this medium of mixing and mashing images together? What is the message that you are trying to convey? It is helpful during this process to plan out the collage and settle on a few important visual elements. In this case, the gate was of the utmost importance, so I structured the supporting clusters of images around it.
Gathering Images
While it is important to use as much of your own work as possible, sometimes the use of stock images is a must. Make sure to give credit when these images are used and take creative control. Don’t just copy and paste the image in, that wouldn’t be making a collage. Extract only the essential elements from these images. Cut, edit, and manipulate them visually to fit your collage. Just try to find images of high enough quality to give yourself as much flexibility during post-production as possible. I like using the search setting functions (size) on google to filter out pixelated images.
Treating Images
The biggest challenge with making a collage of this nature is to harmonize images taken from various different angles and at a myriad of different exposures to create one cohesive visual experience. To do this, we have to first remove the background from all of the images in our collage. This can be done using a combination of selection tools and masking tools in photoshop.
Removing Background
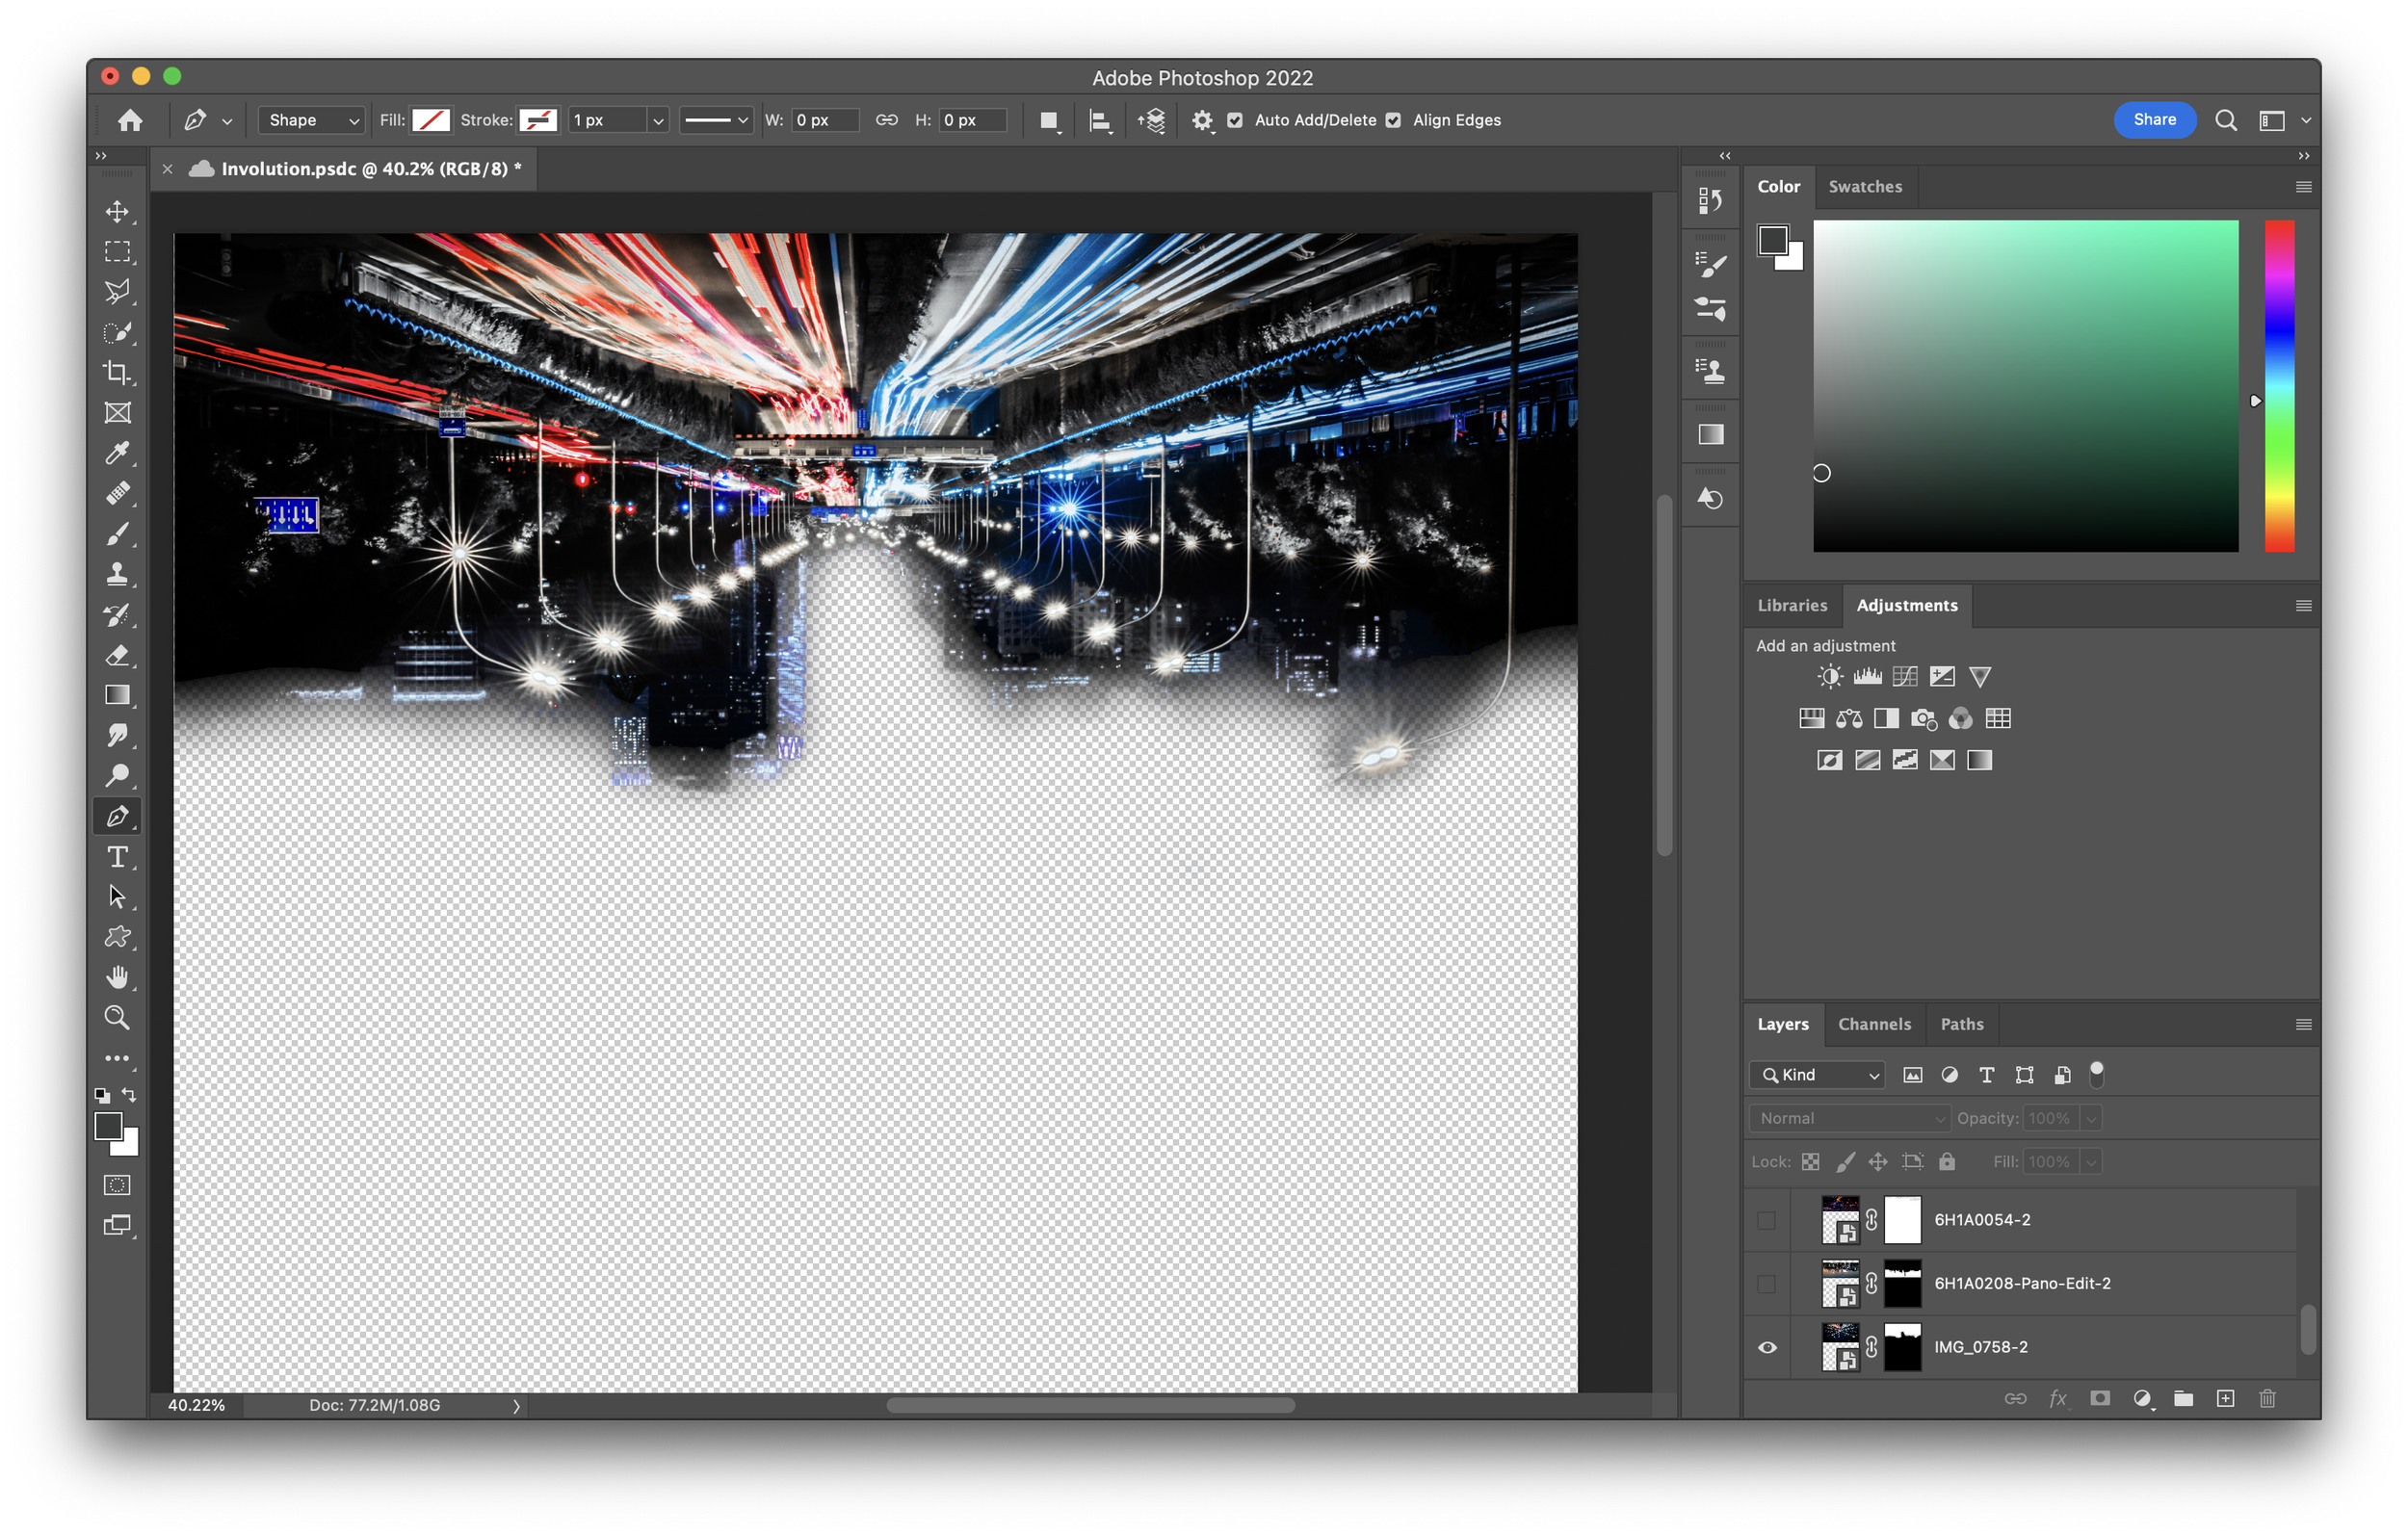
The fastest way to isolate the background is to click on the desired layer and go to select > subject. Once the selection is made, click on “create new fill or adjustment layer.” This method works best with images that have a simple background. You can fine-tune the selection by selecting the quick selection tool in the toolbar and filling in/deleting (hold down the option key) areas in the selection.
When more precision is required, we’ll need to use the pen tool to create the desired selection manually. It is helpful to enlarge the image and alternate between the freeform pen tool and the curvature pen tool to create the most precise selection of the desired object. Once the object is selected, right-click make selection, go to layer, and select new fill layer - solid color (black).
When dealing with landscape/cityscape shots, Photoshop has a host of tools that makes it easy to separate the foreground and background. Go to select > sky or focus areas to cut out large chunks easily. Finally, to soften the harshness of these layer masks, apply a soft brush tool at 100% smoothing and 100% flow to the contour of the object. With all these techniques, it is important to create layer masks as opposed to making destrutive changes to the images themselves.
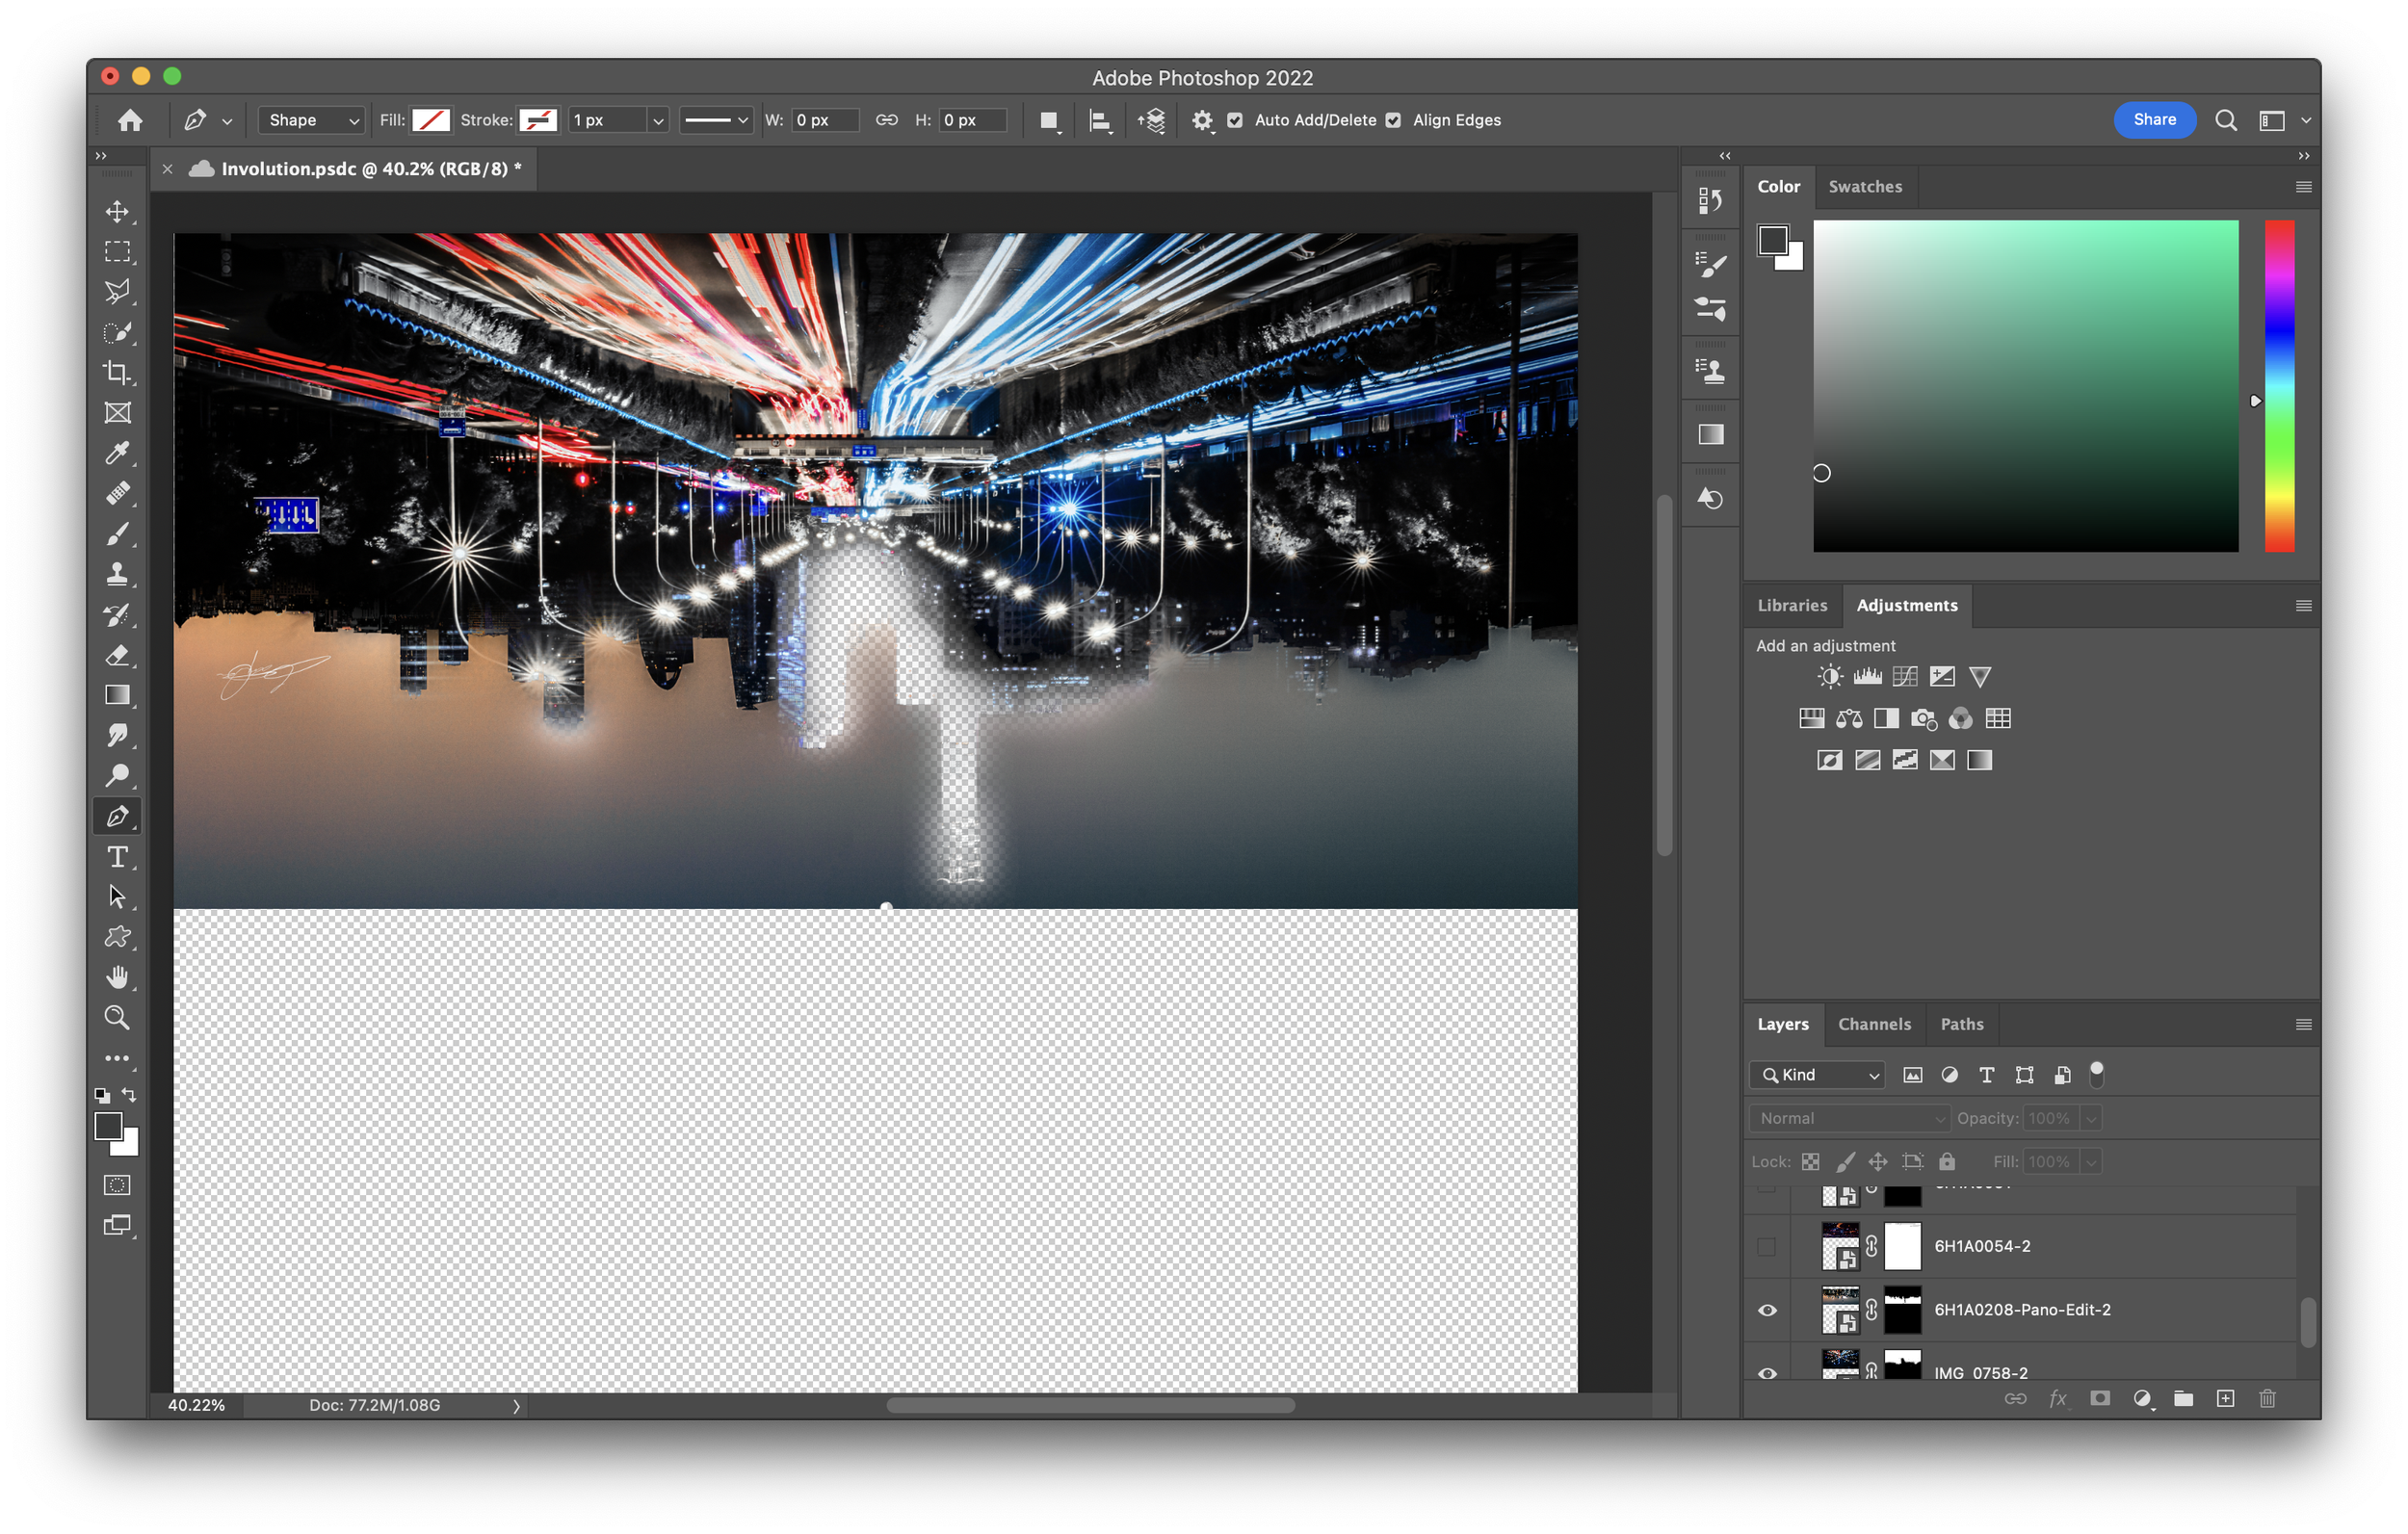
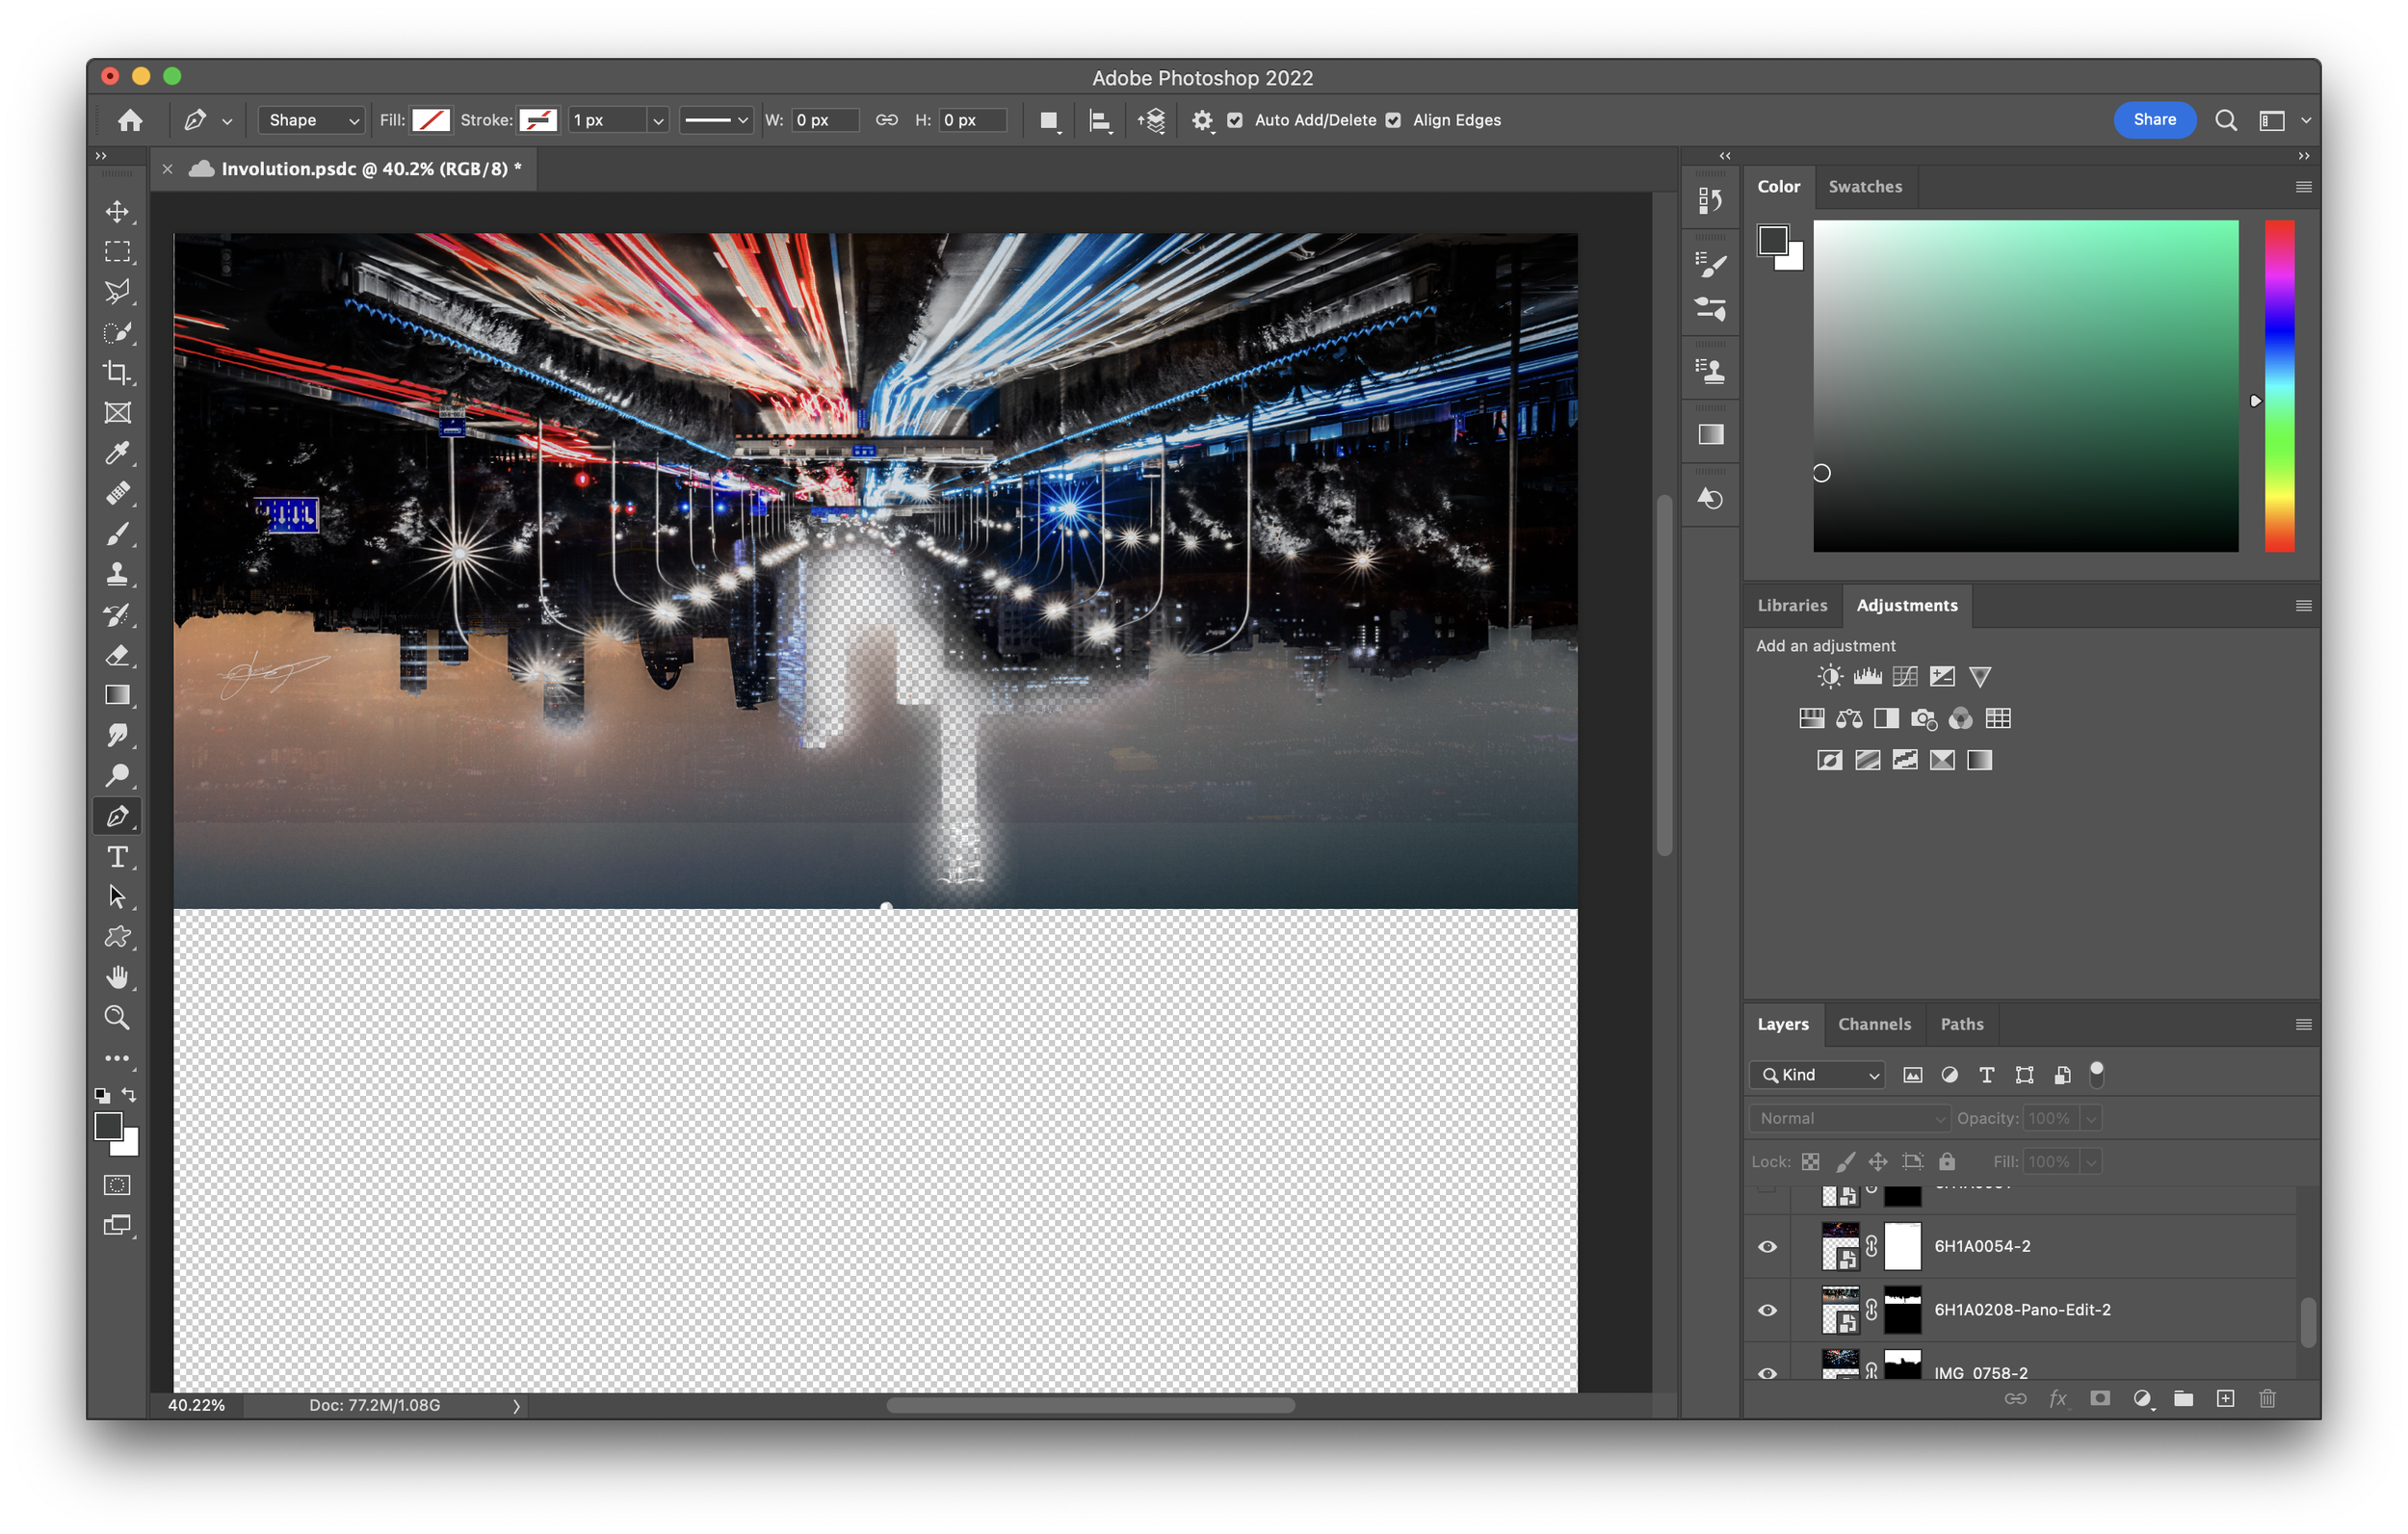
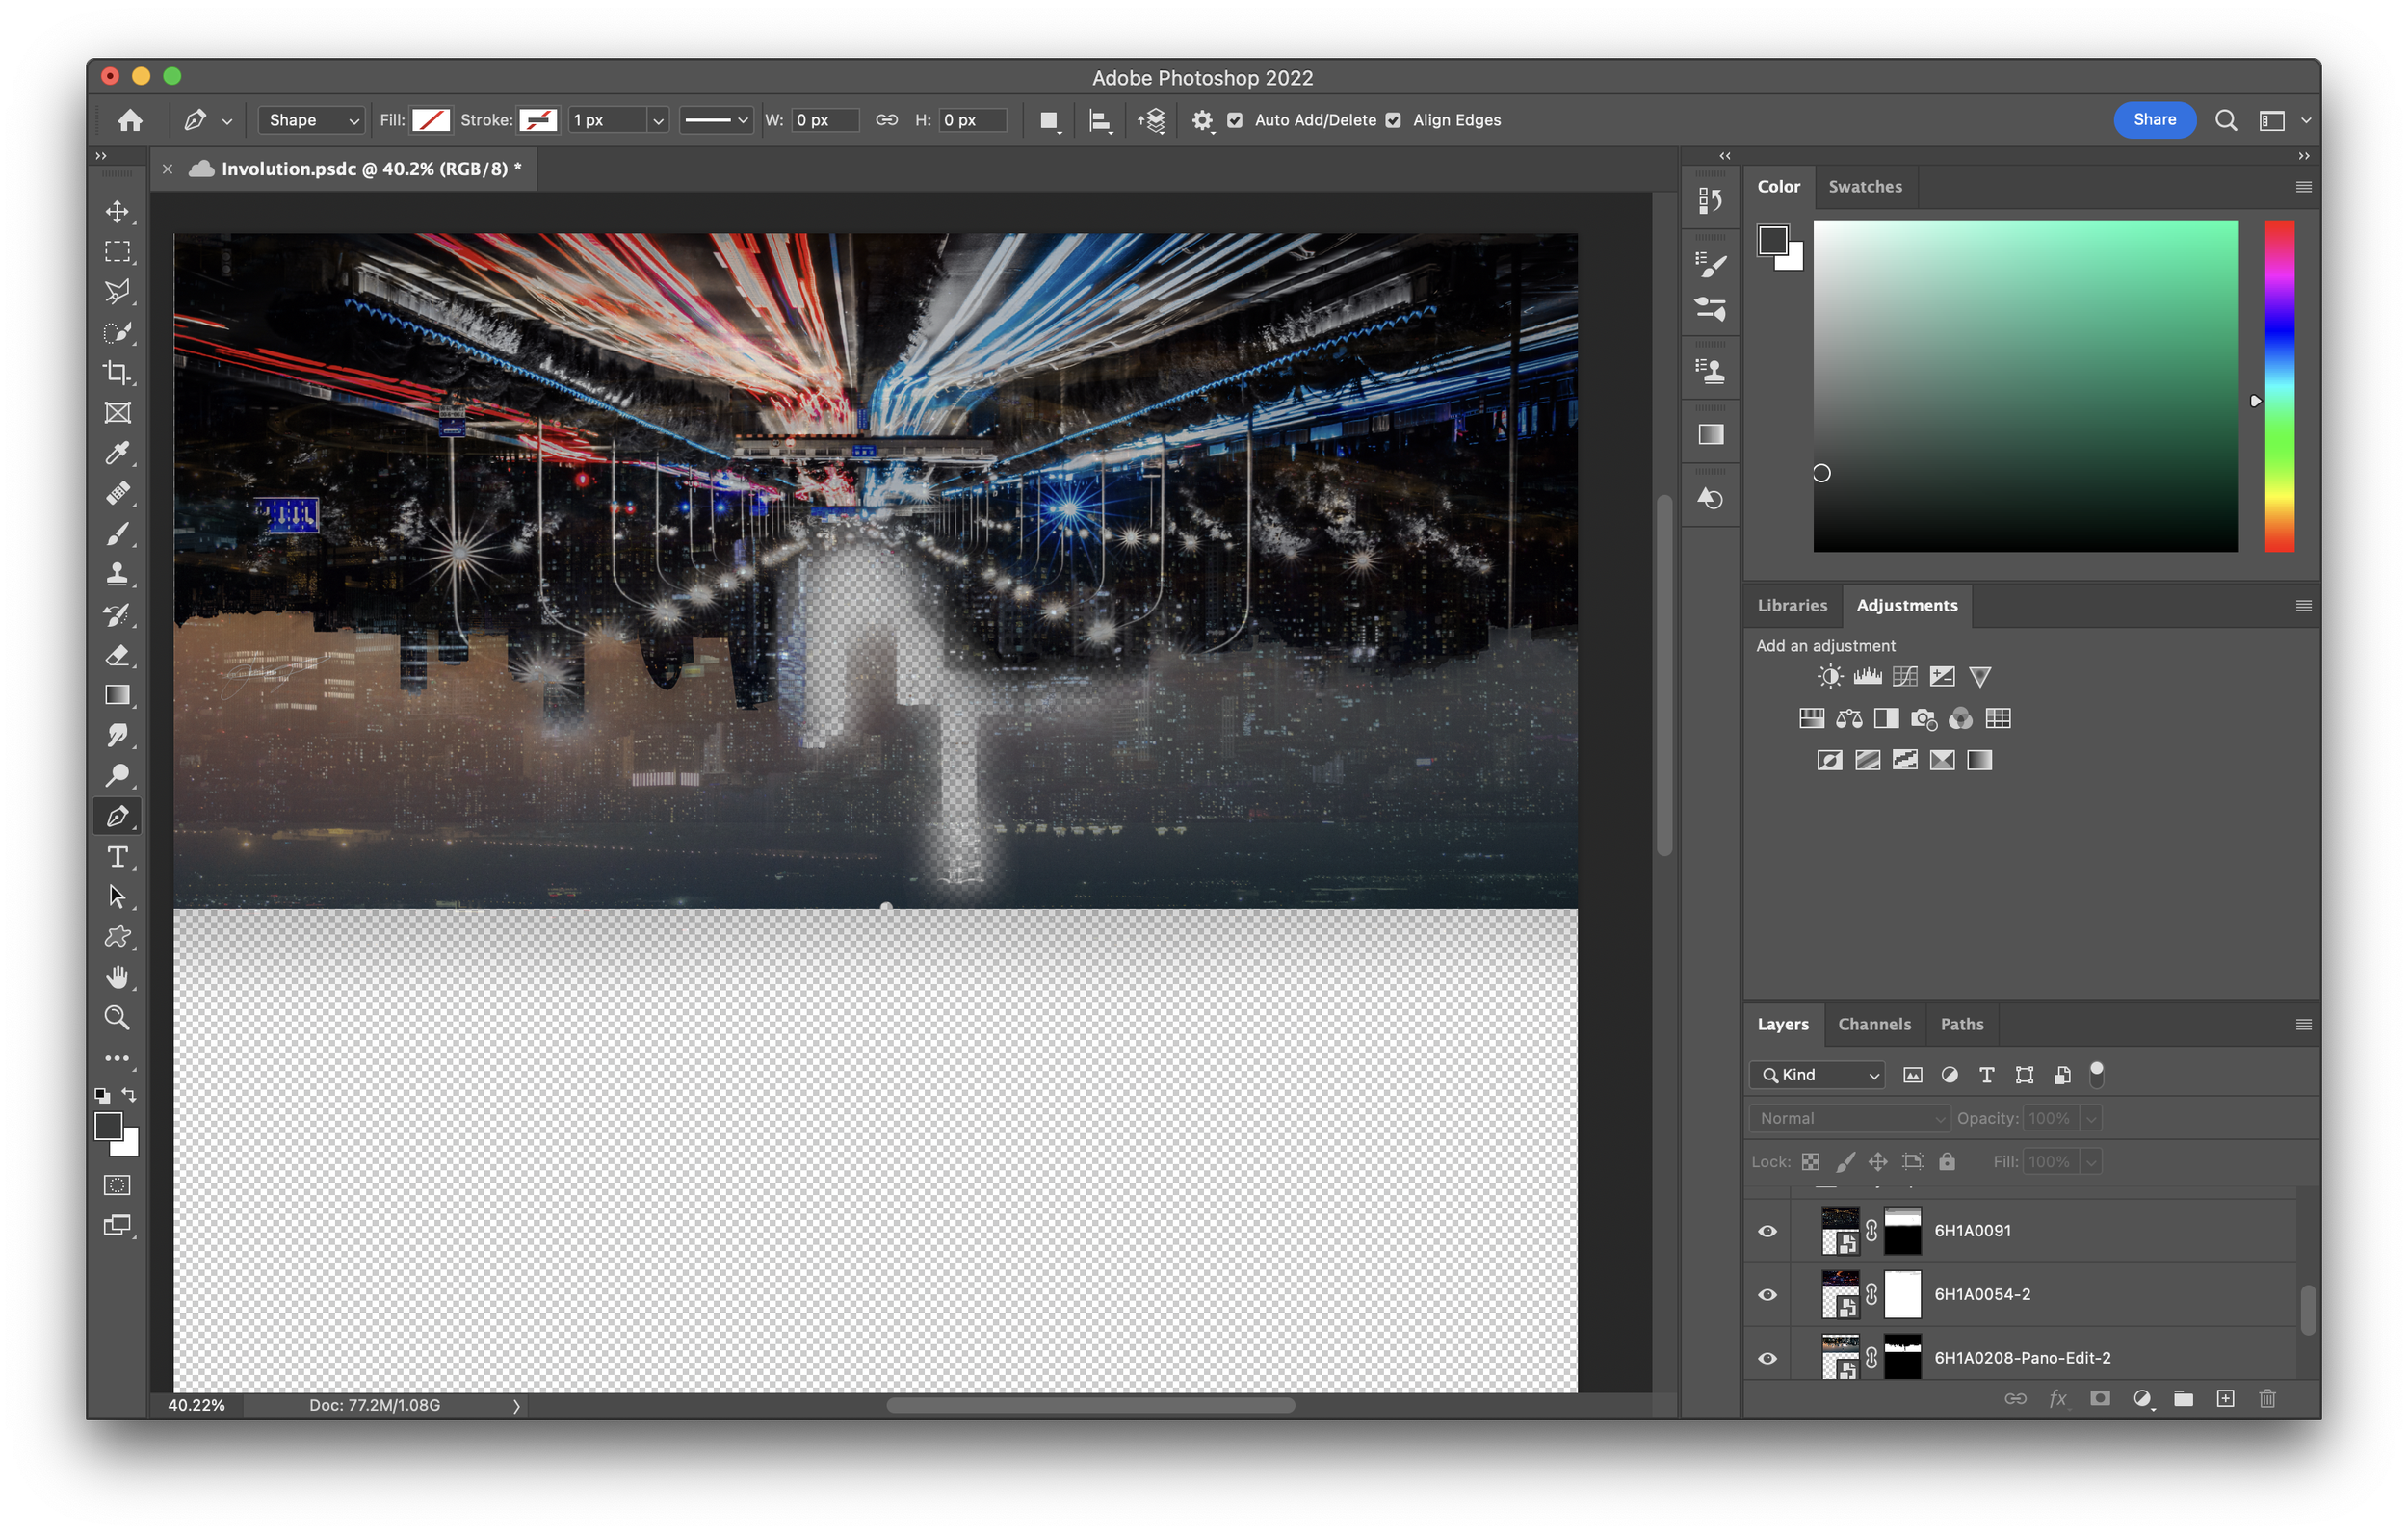
Manipulating Perspective
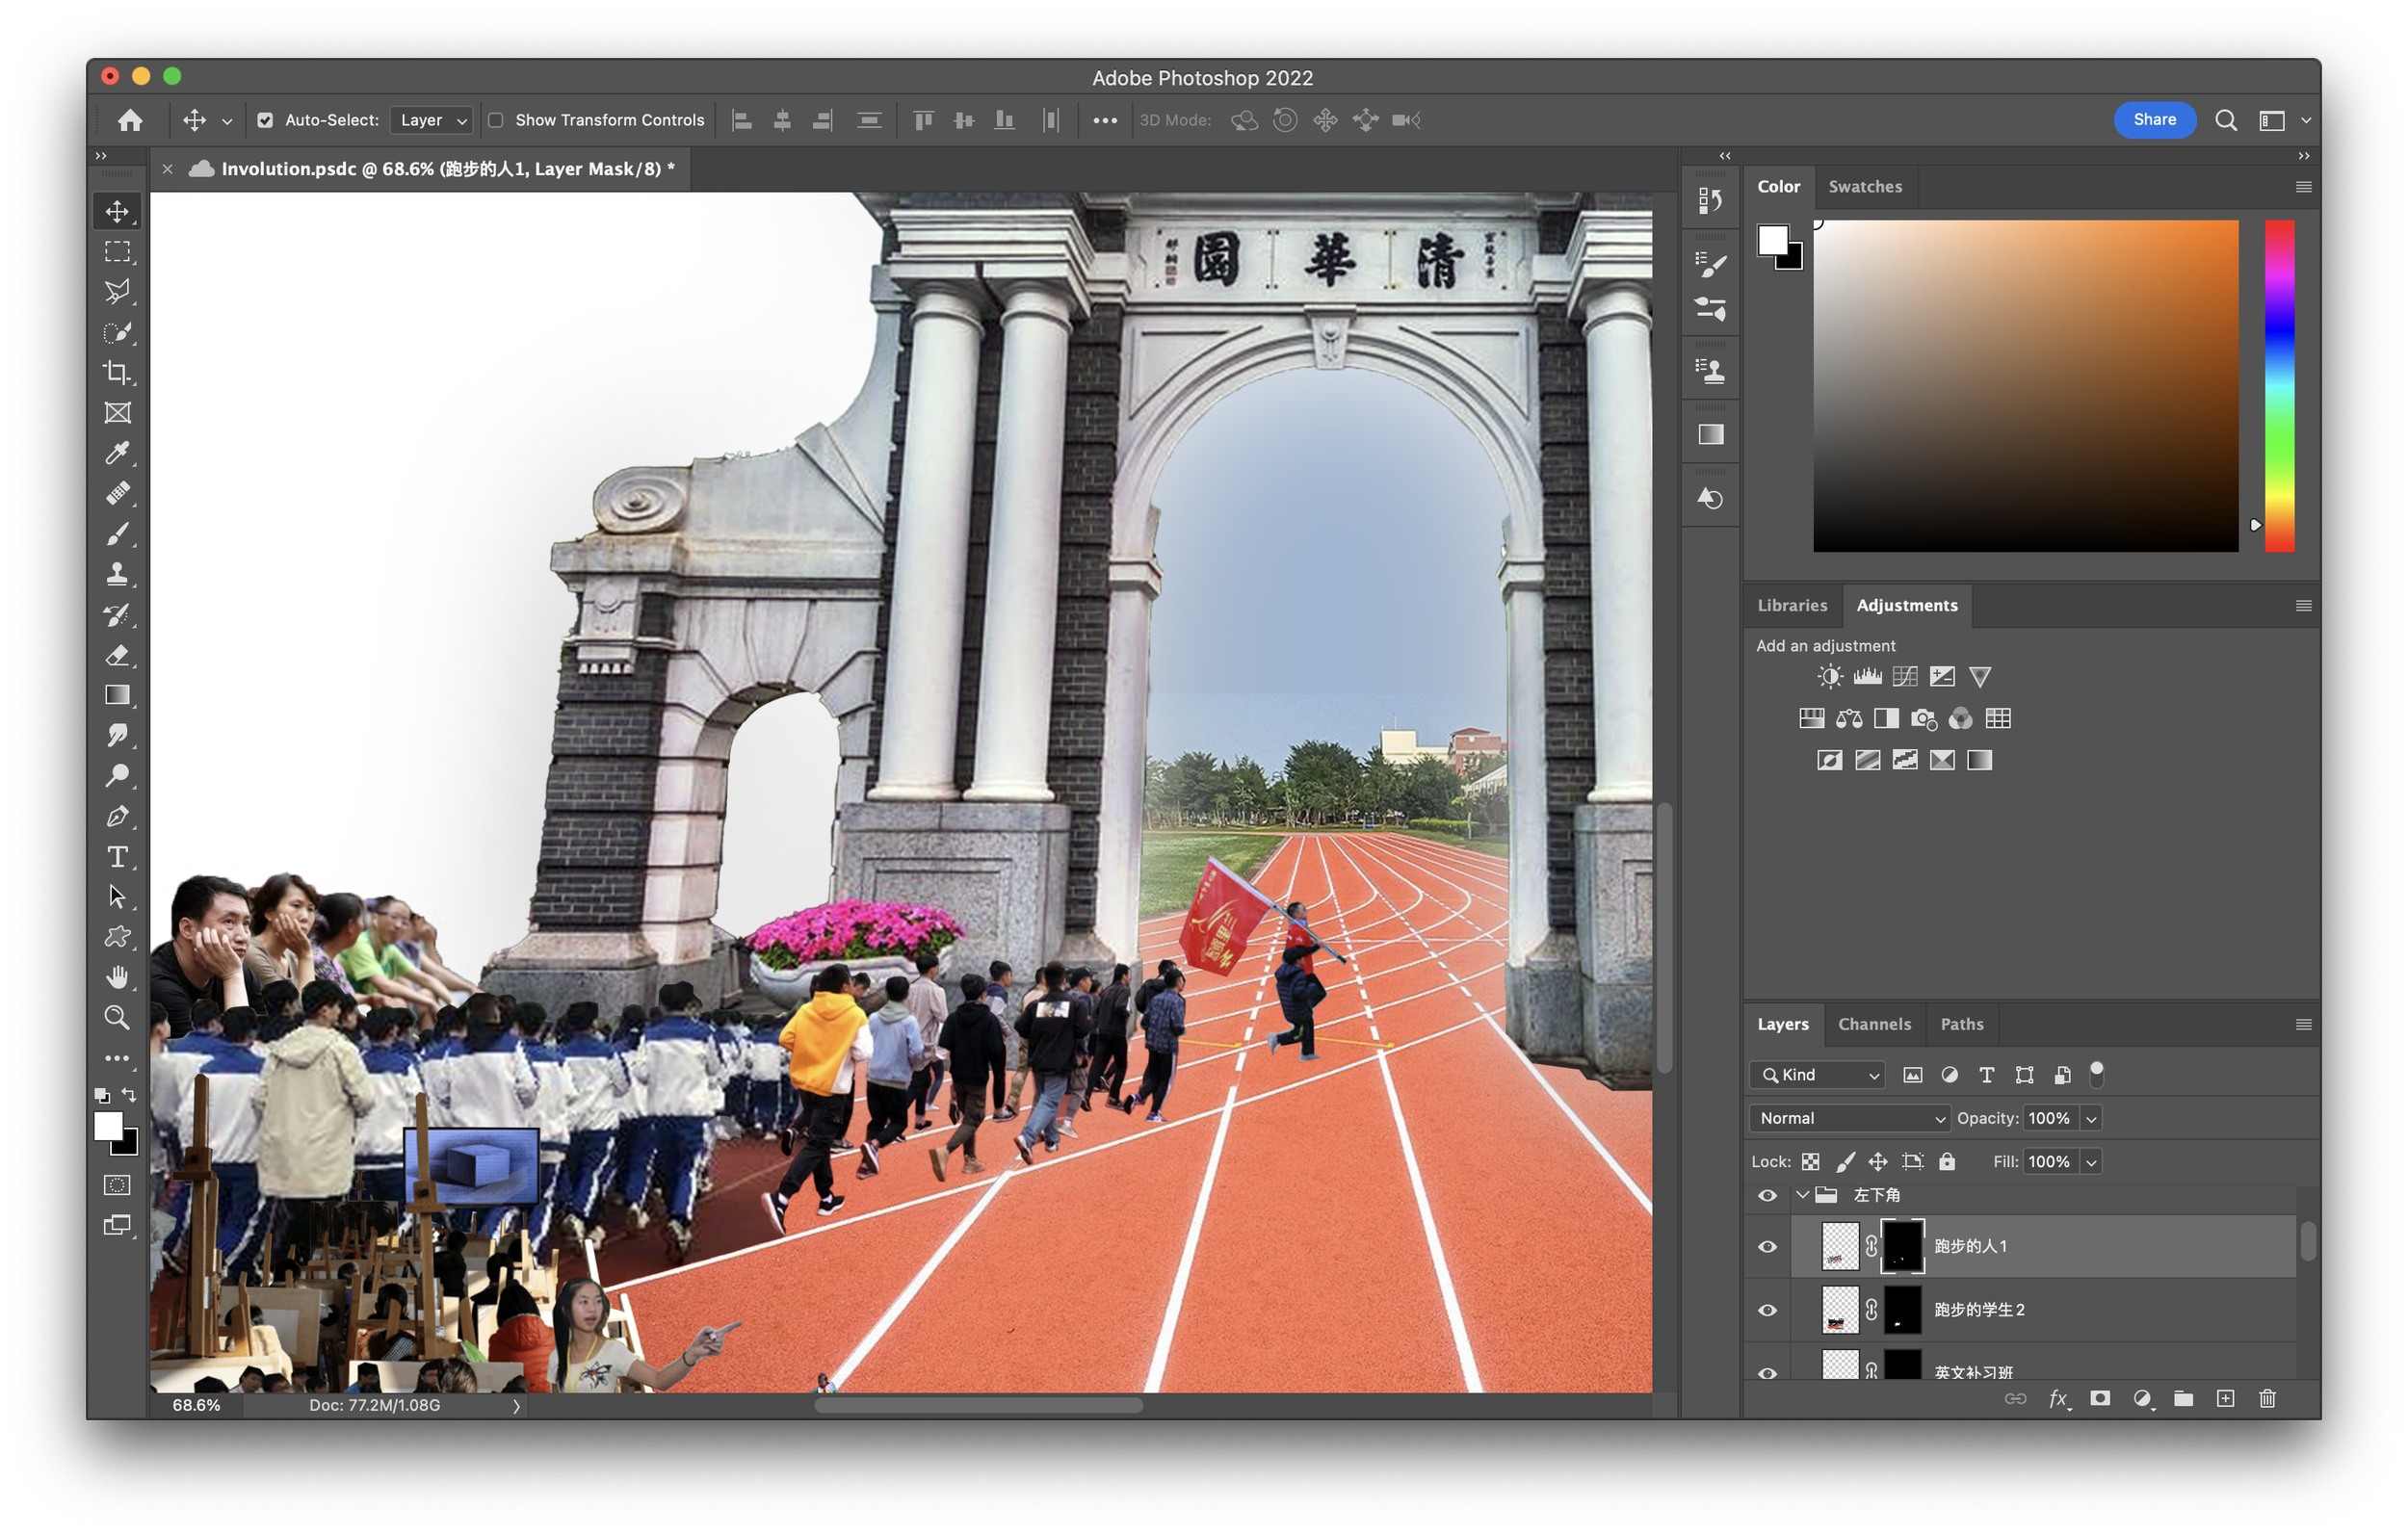
Often times stock images are not shot from the desired angle and throws off the perspective of the collage. Various adjustment tools can help us fix this. Play around with perspective, skew, distort, and warp until you are happy with the result.
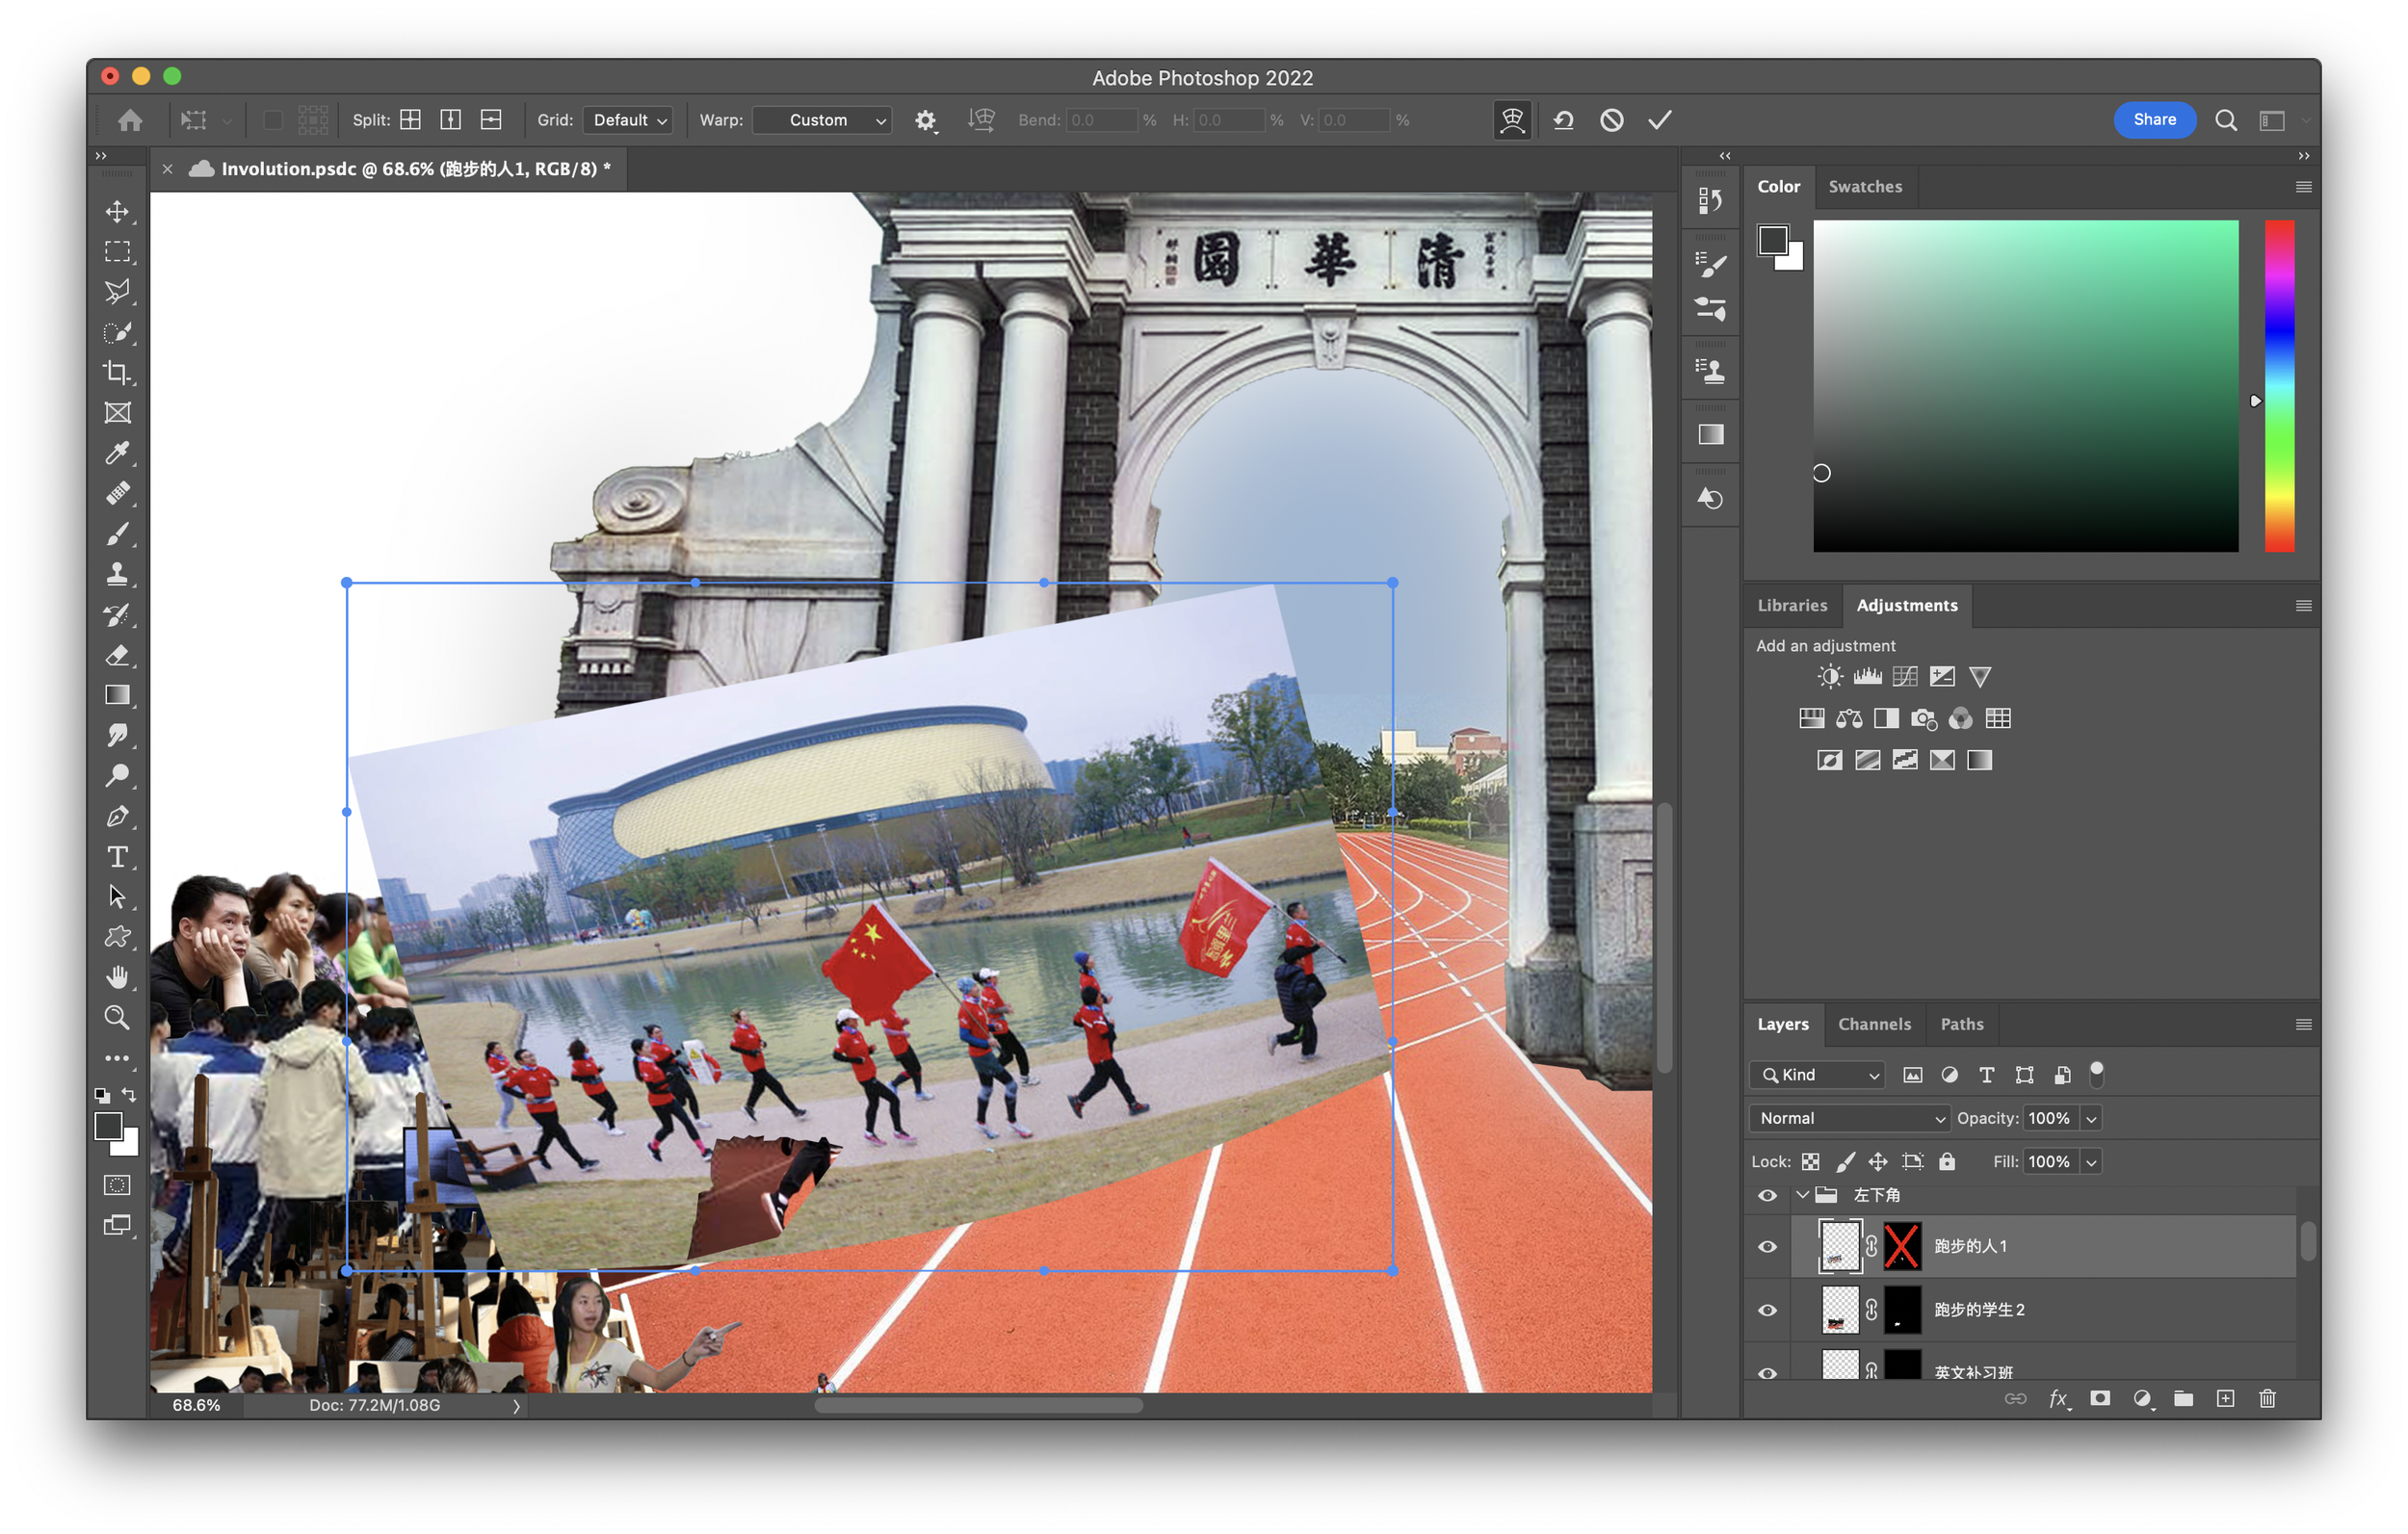
Layering
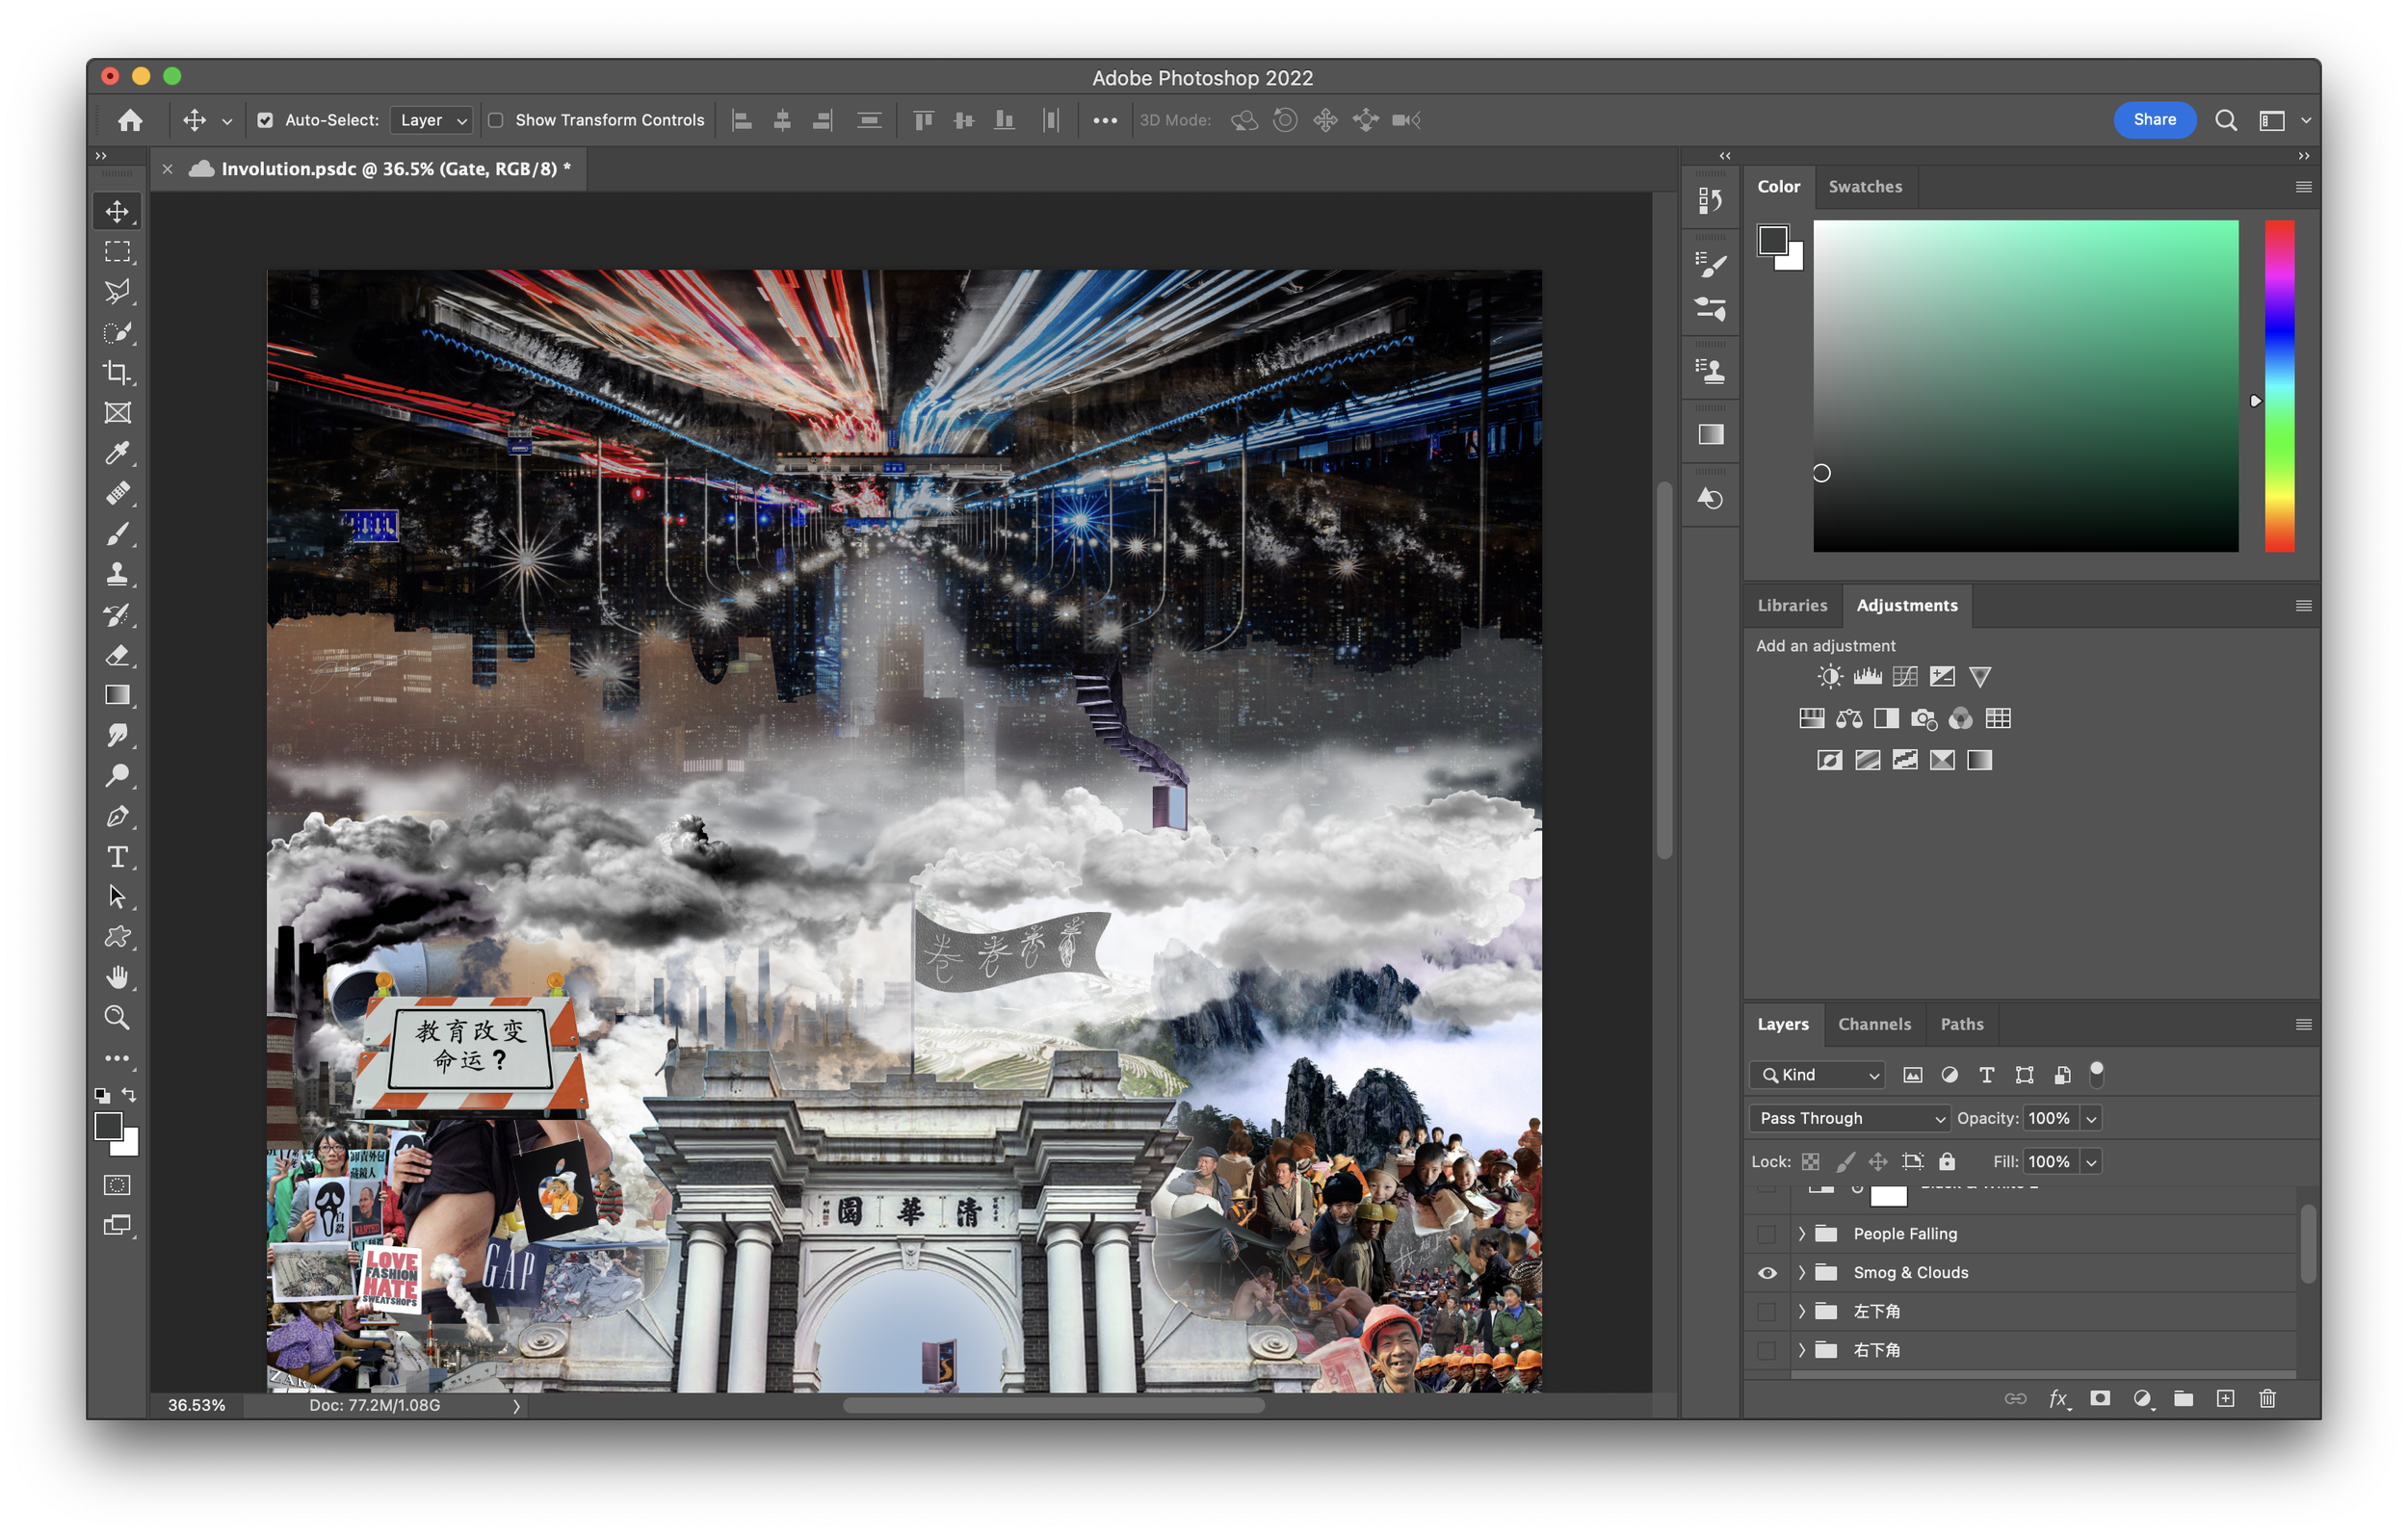
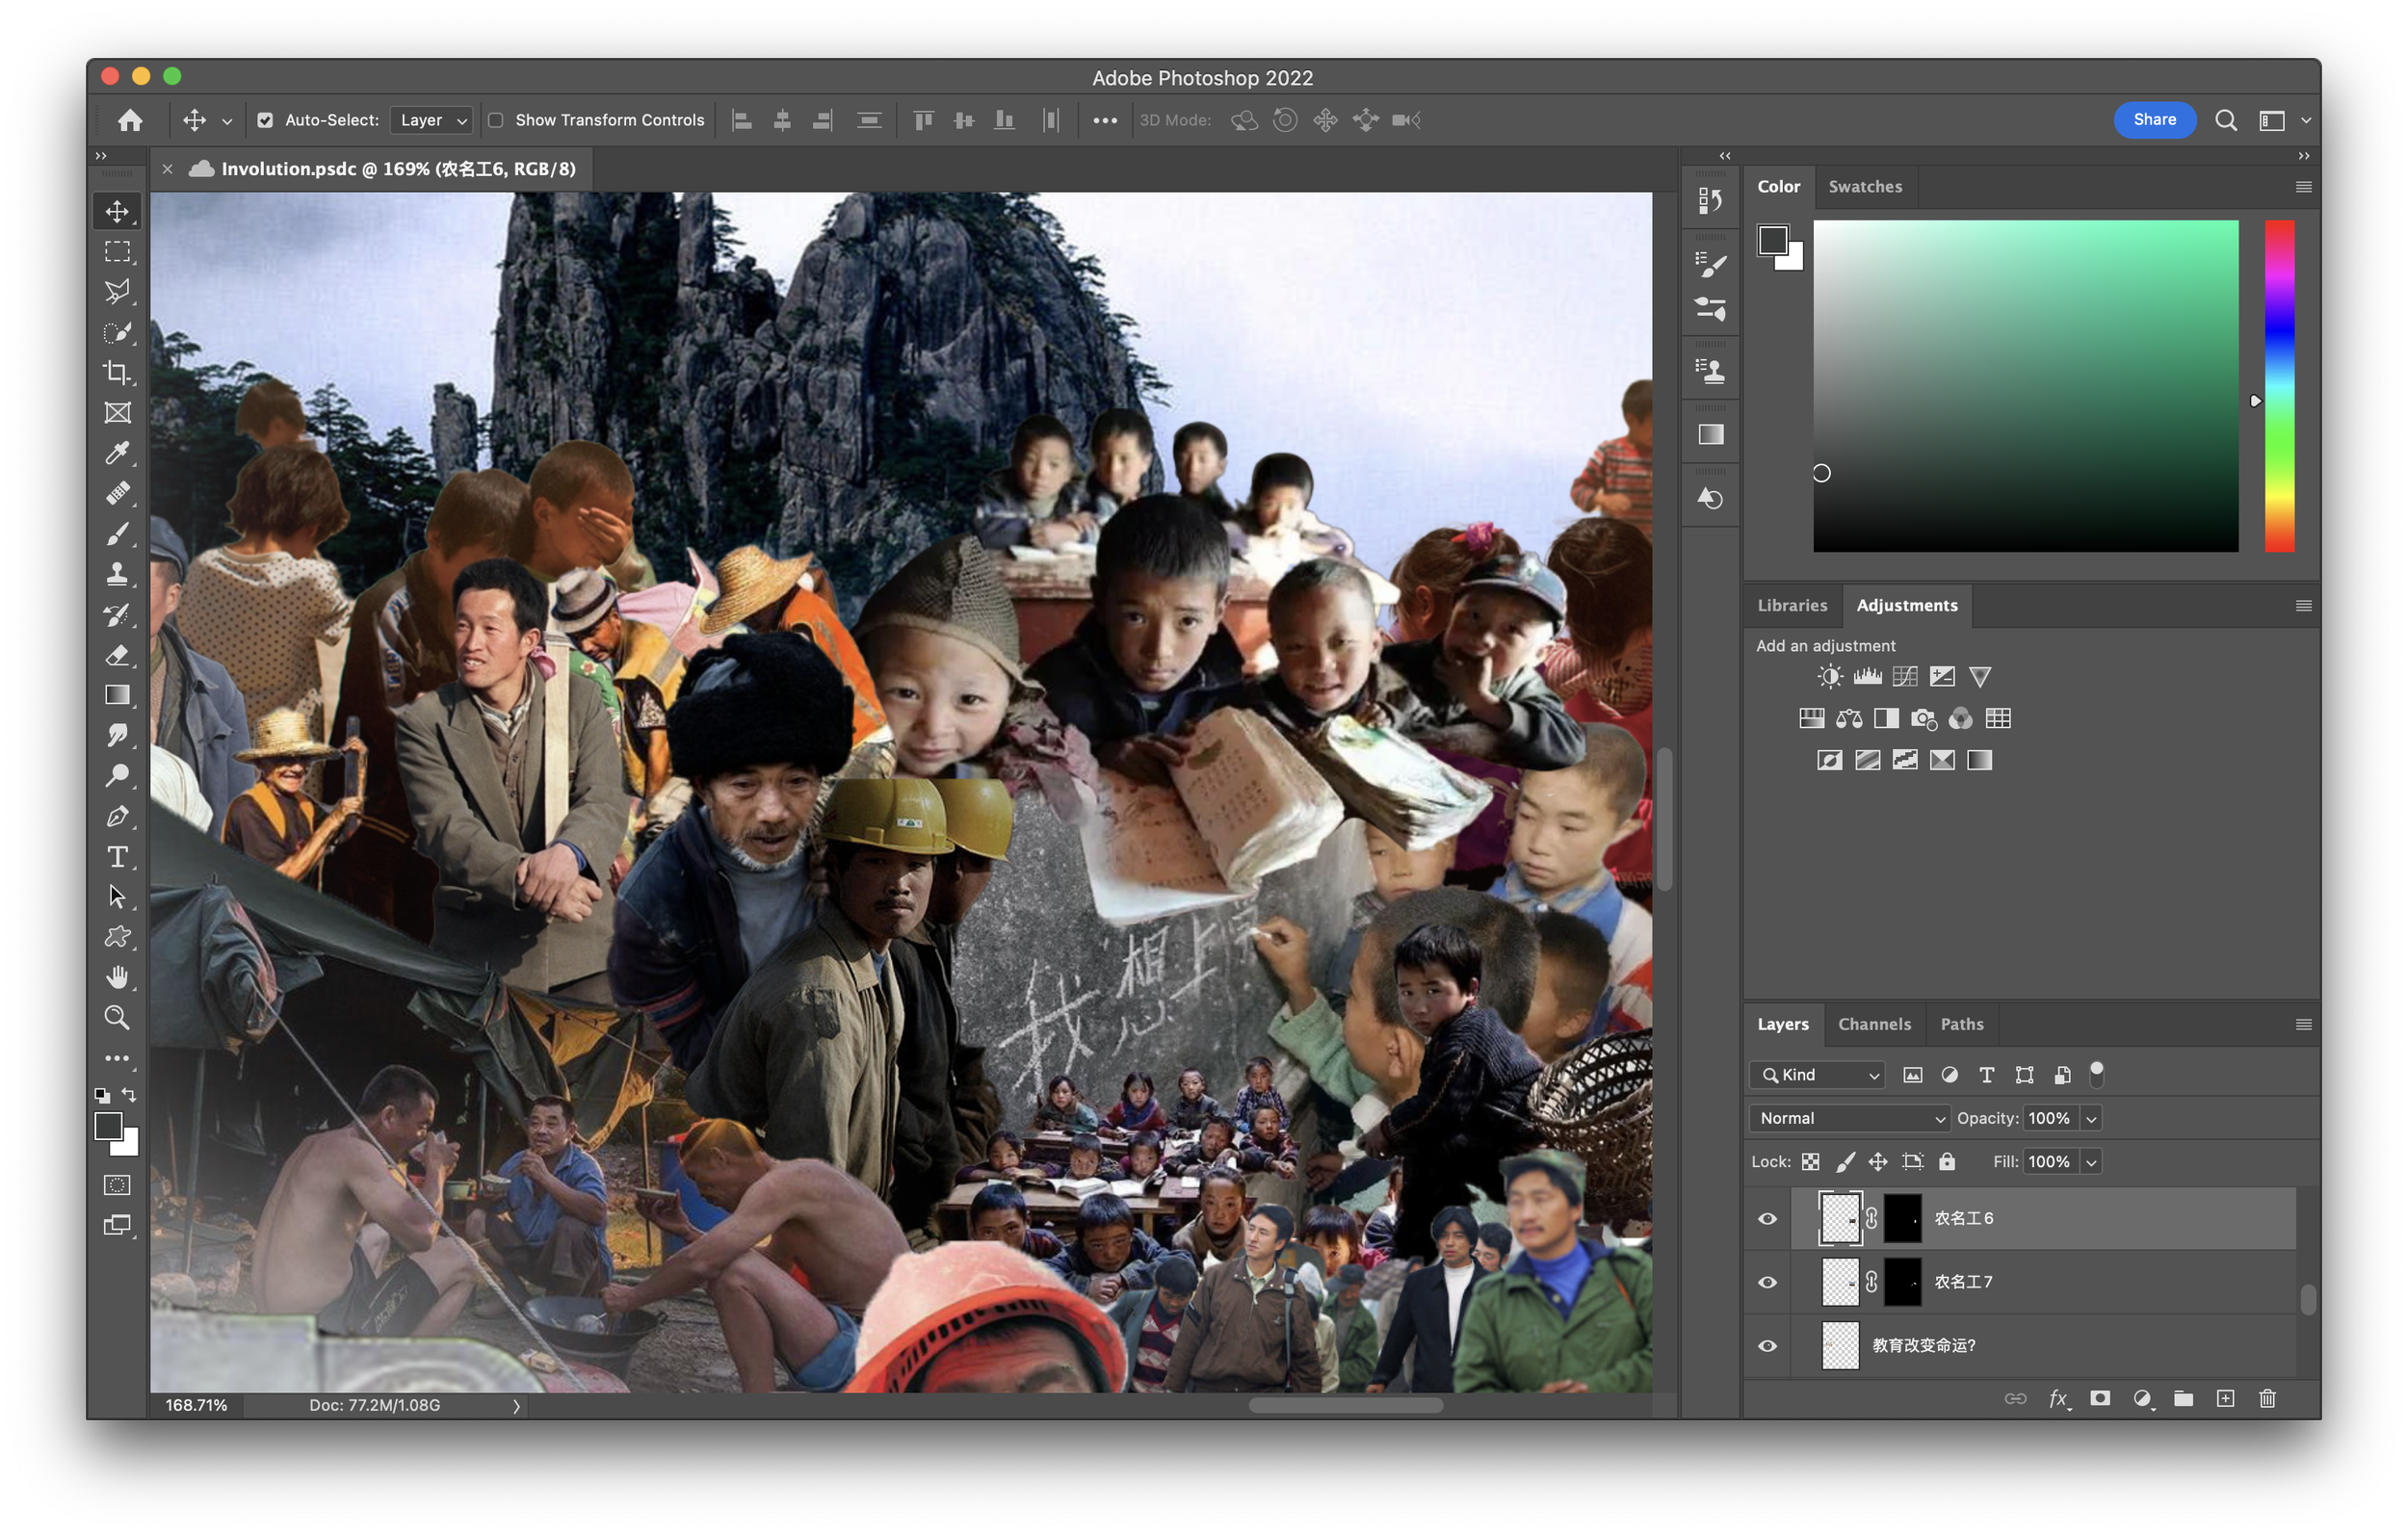
Layering is by far the most important step in creating a cohesive photographic collage. Use leading lines, shapes, and colors to your advantage. Hide borders and cuts behind images, and use similar objects to connect layers. Try to avoid sharp lines, rigid shapes, and empty spaces that can give away the illusion. Experiment with opacity filters to help blend layers together.
Color Adjustments
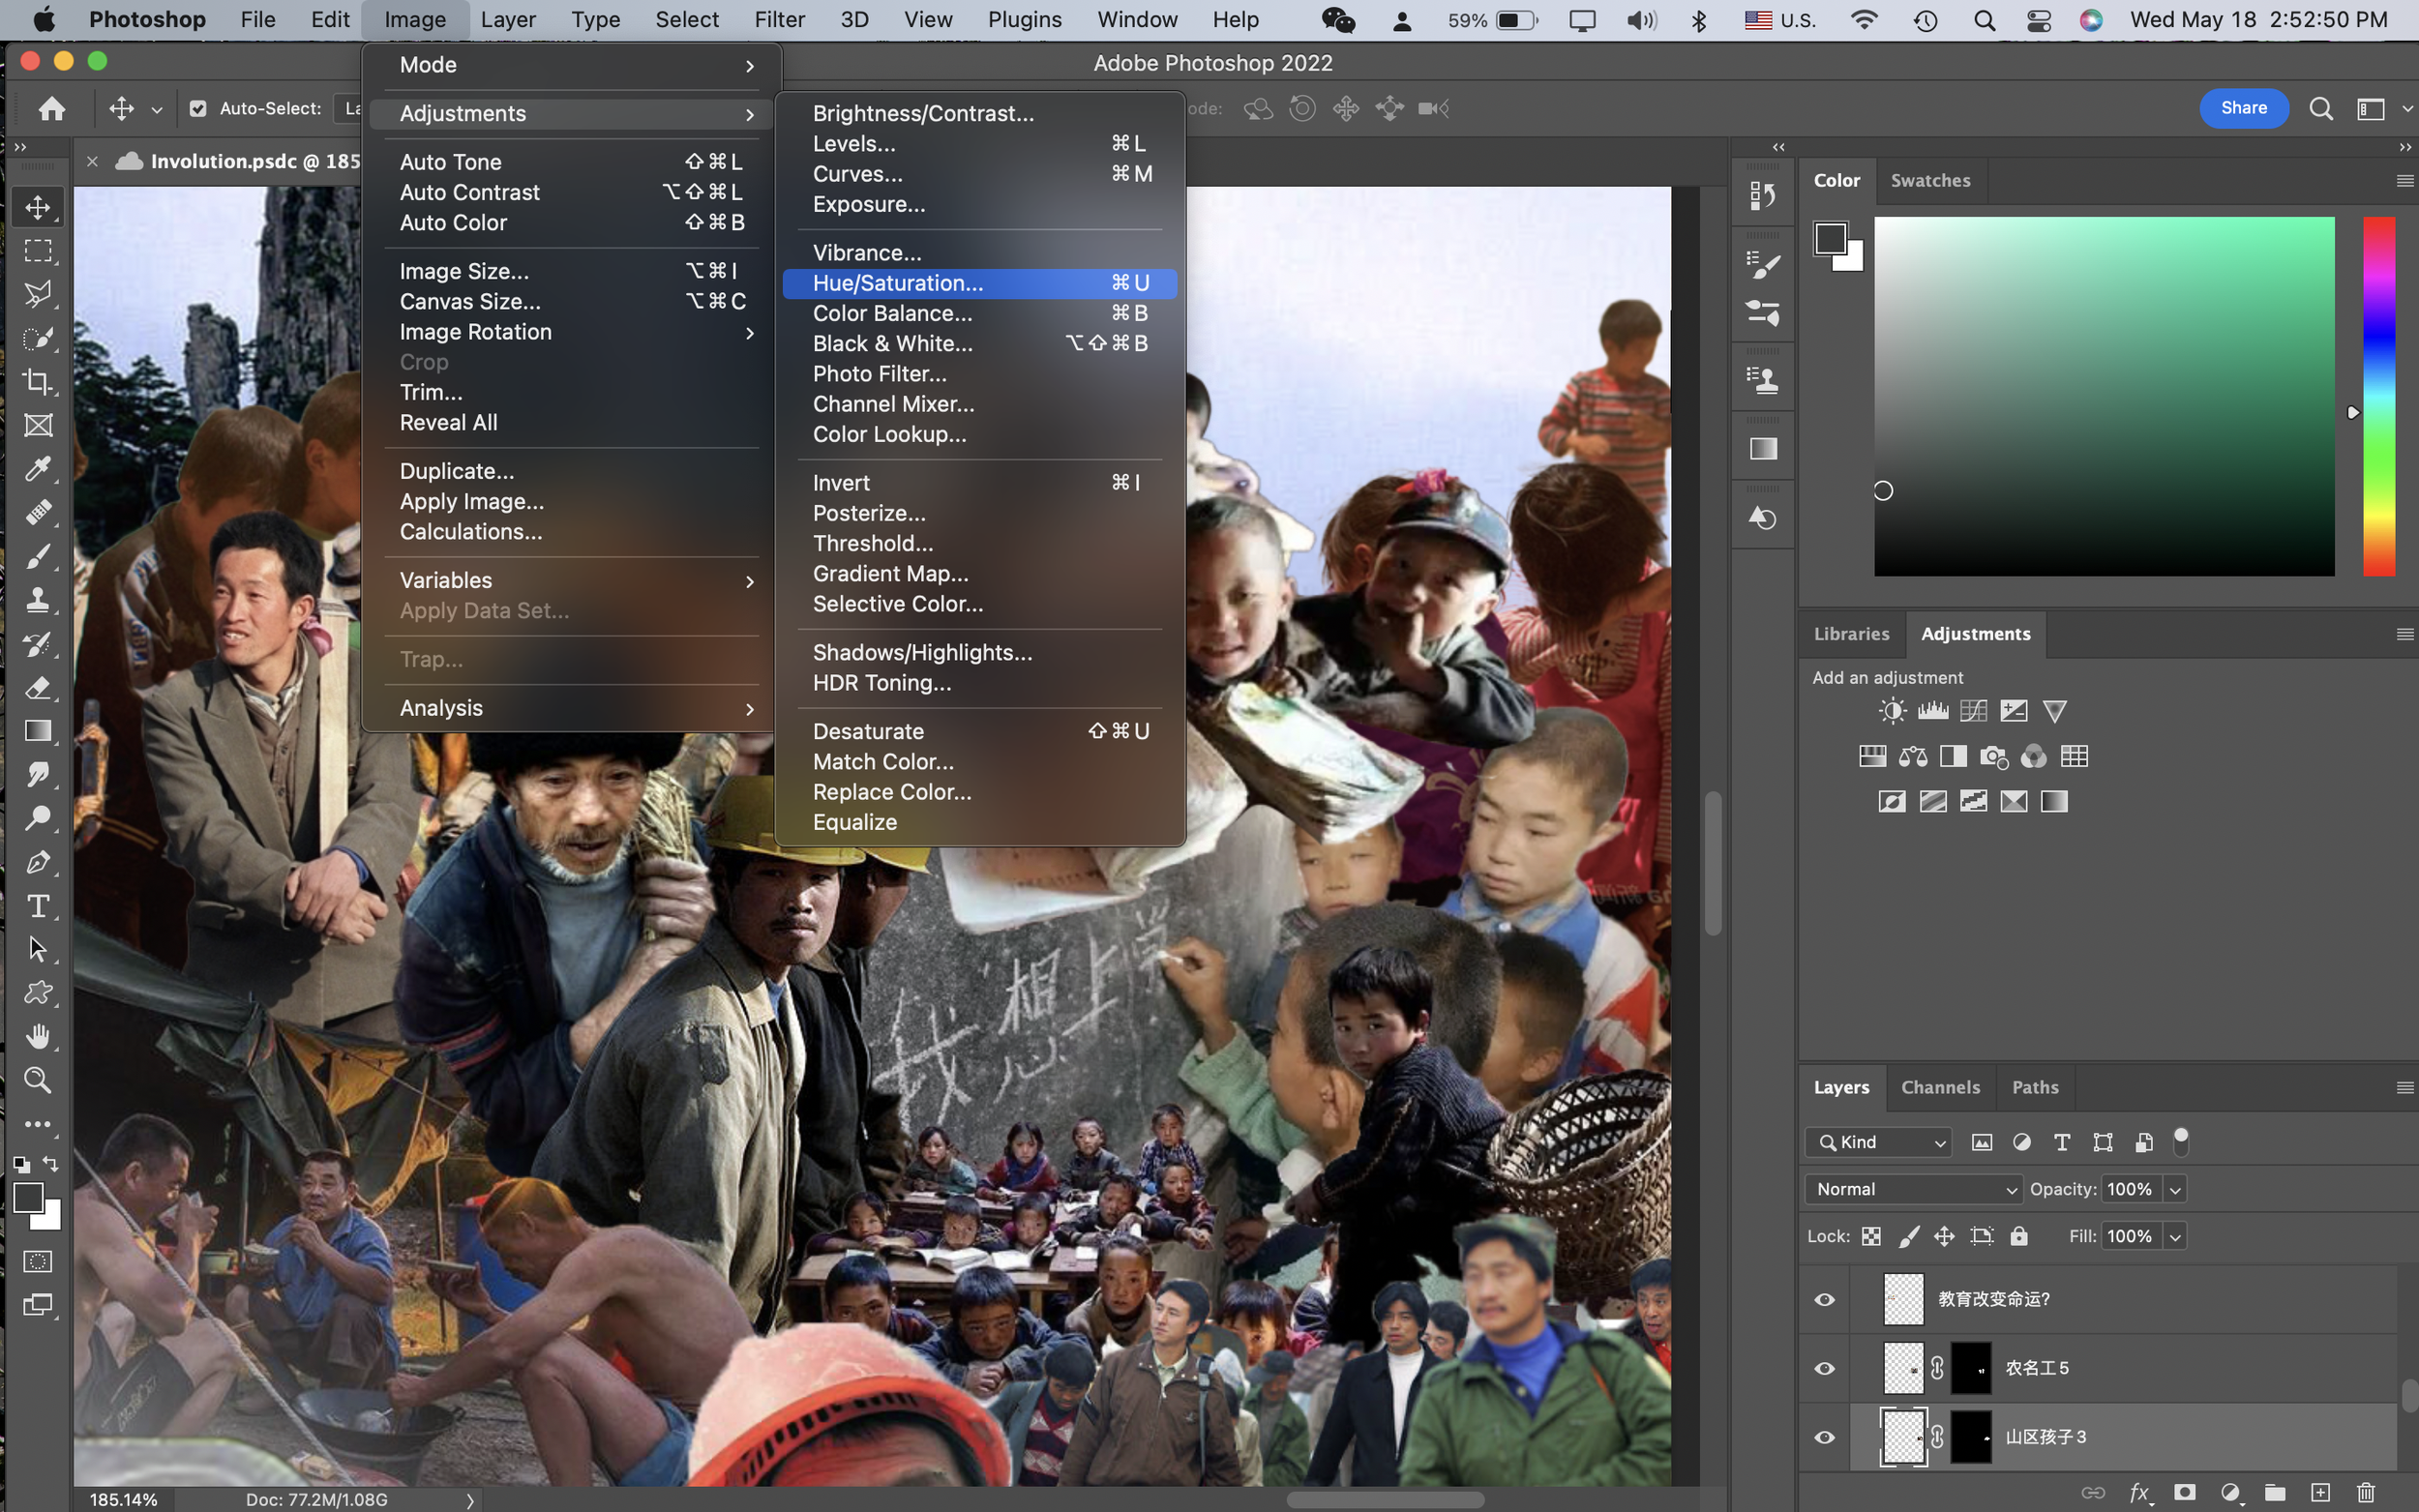
Once all the layers are in place, we just have to make tonal and exposure adjustments to the images. It is most efficient to use the auto settings as a starting point. Press shift + command + L for auto tone, option + shift + command + L for auto contrast, and shift + command + B for auto color. You can fine tune the image by applying an adjustment mask.
How to Create a Halo Effect
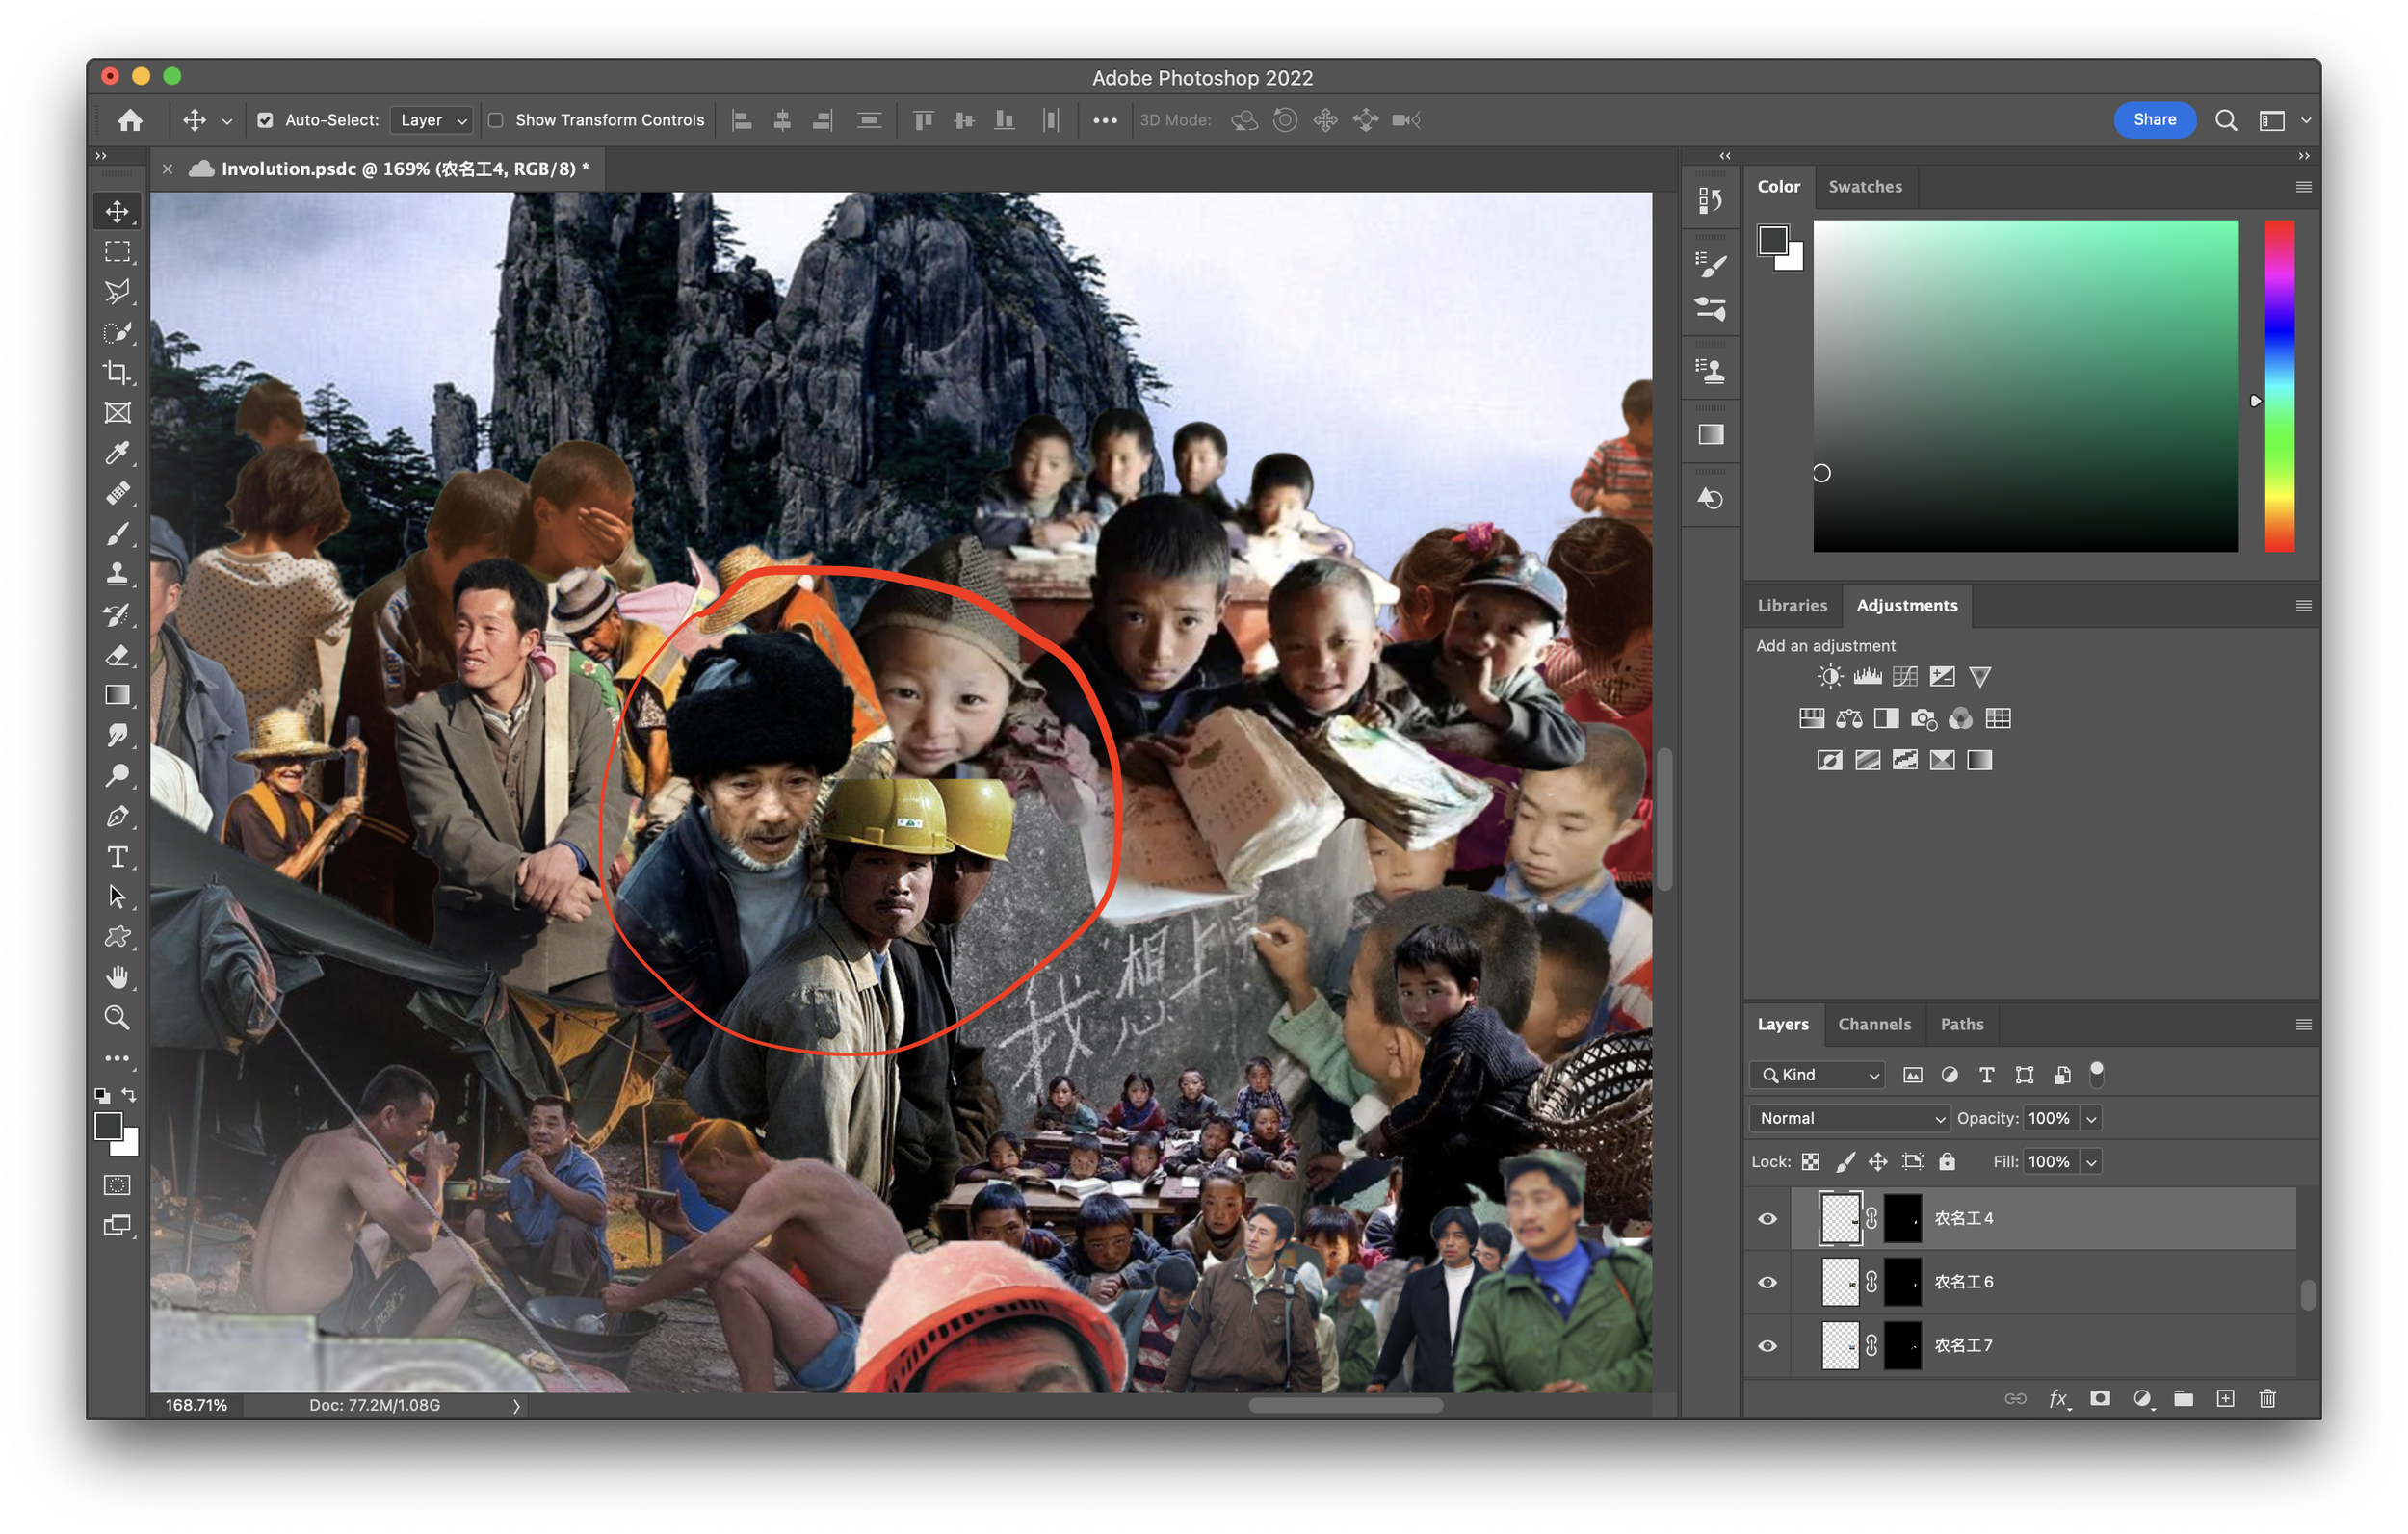
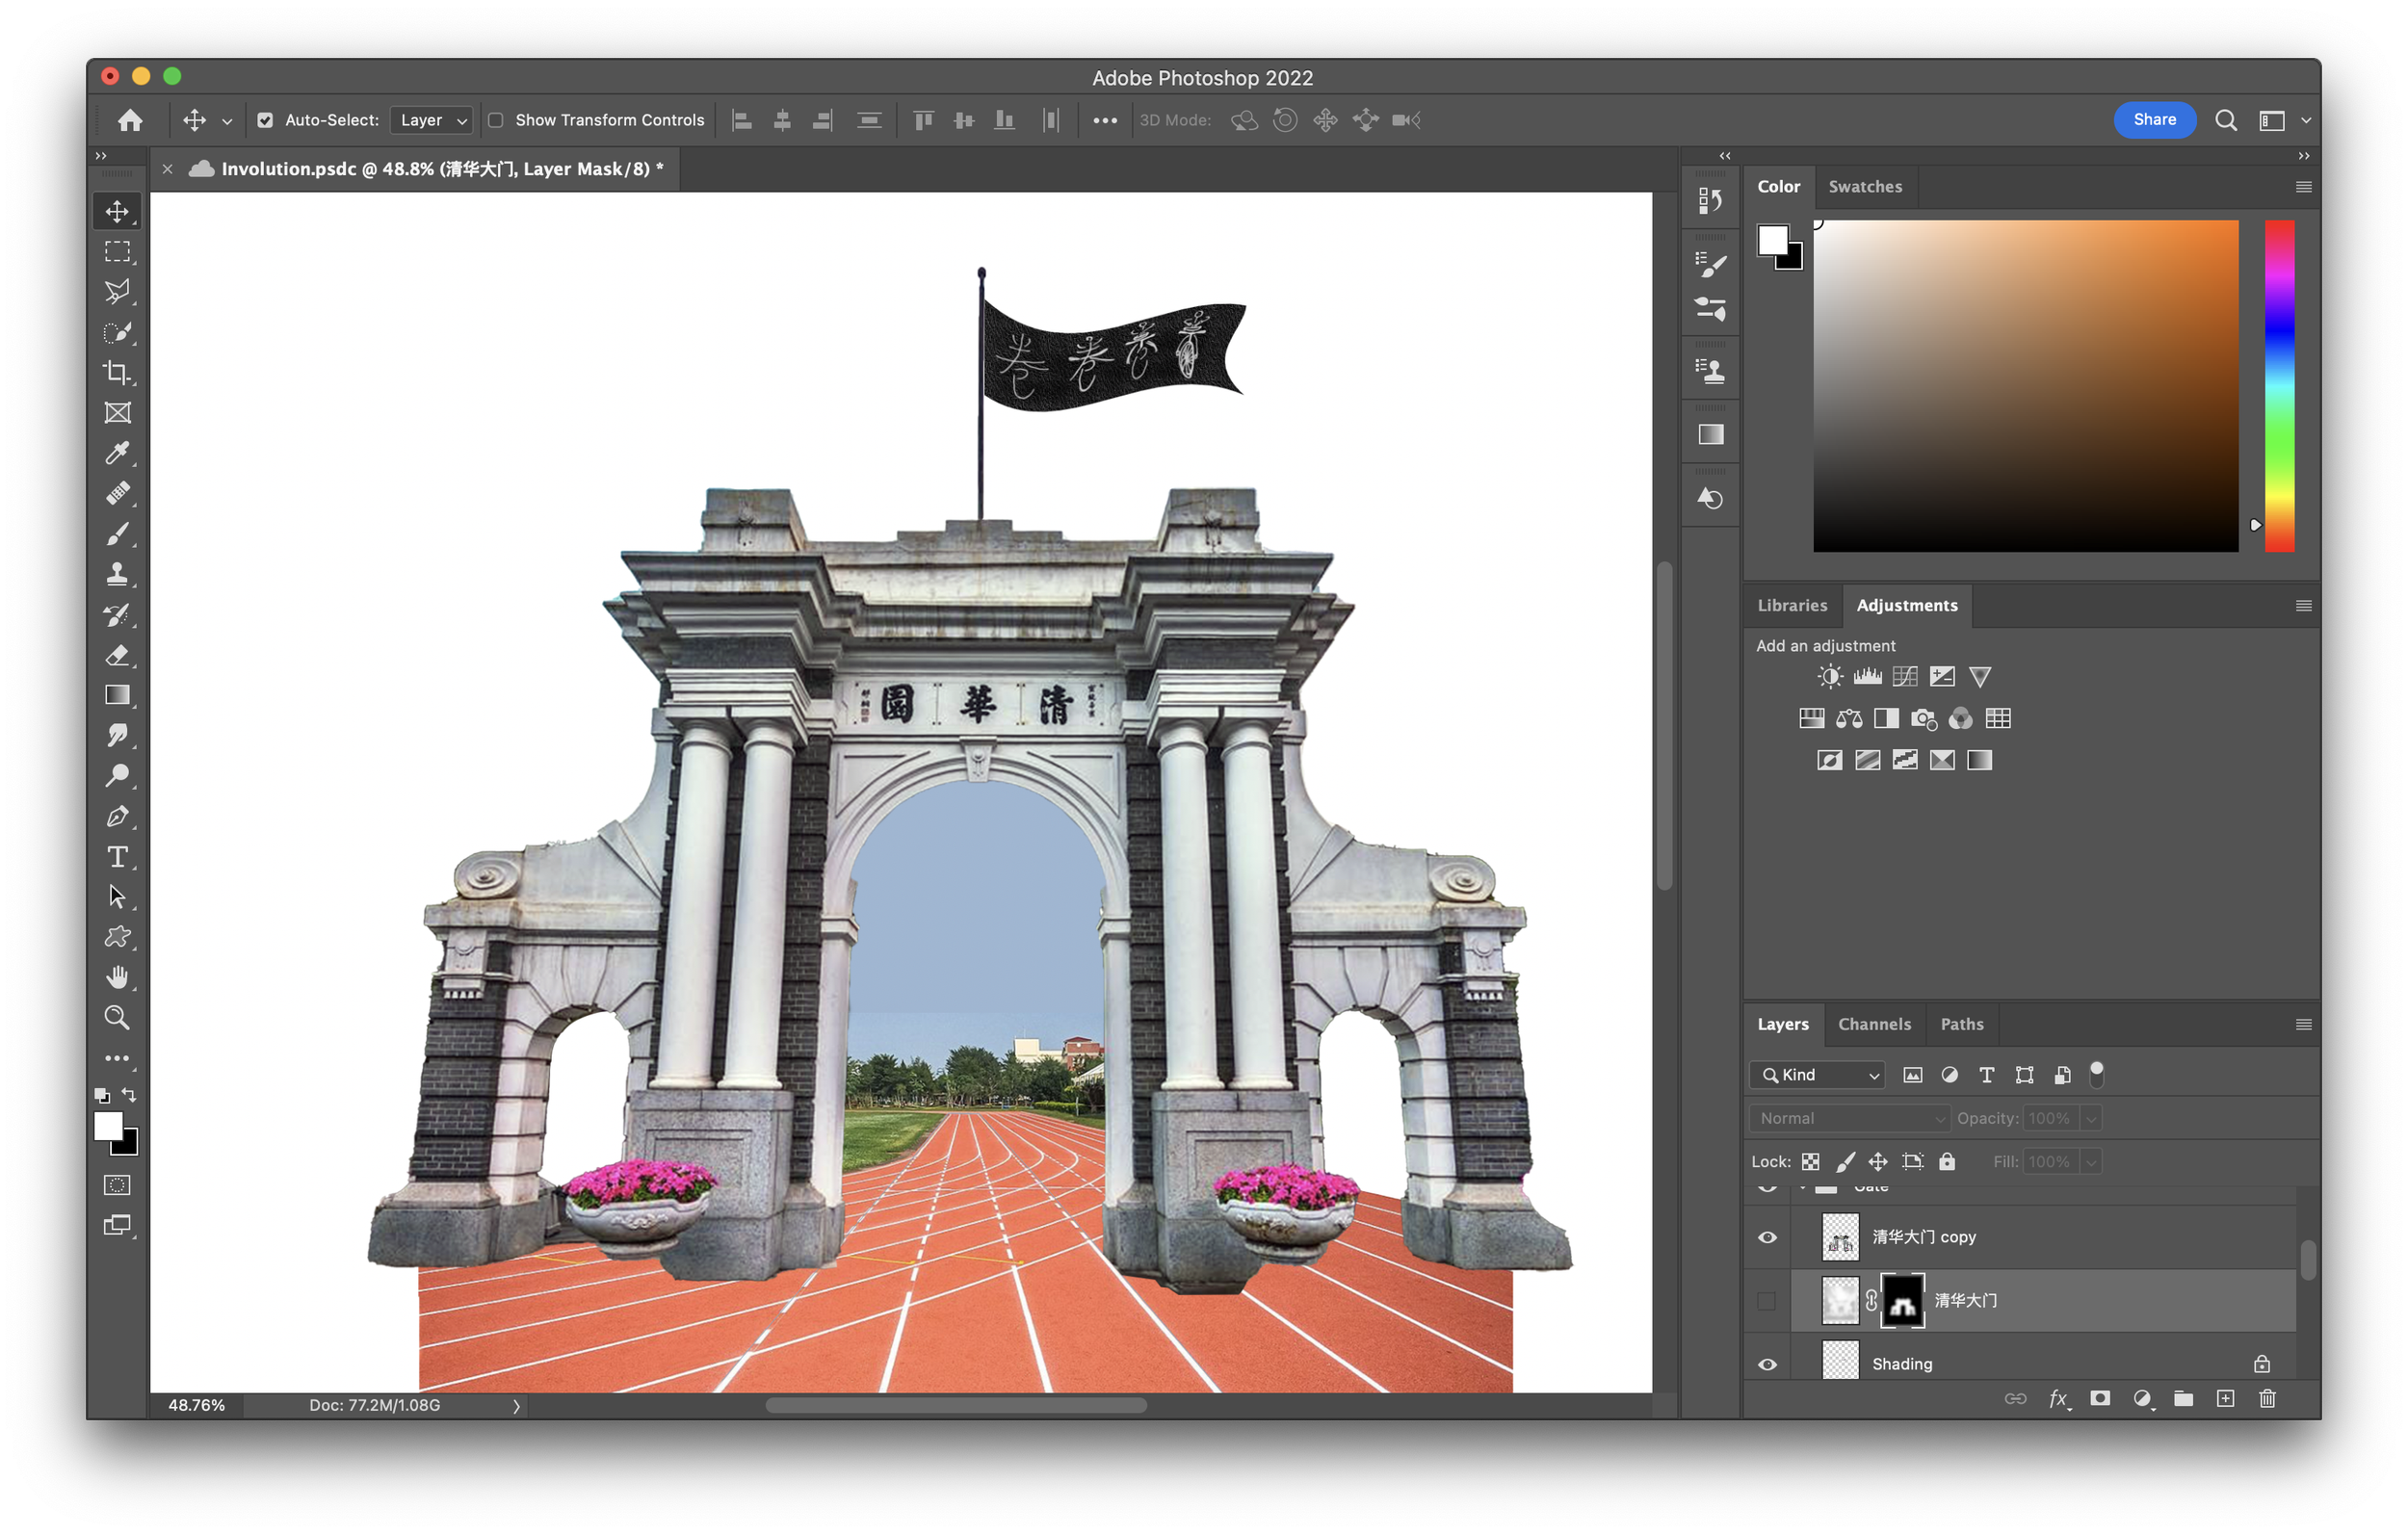
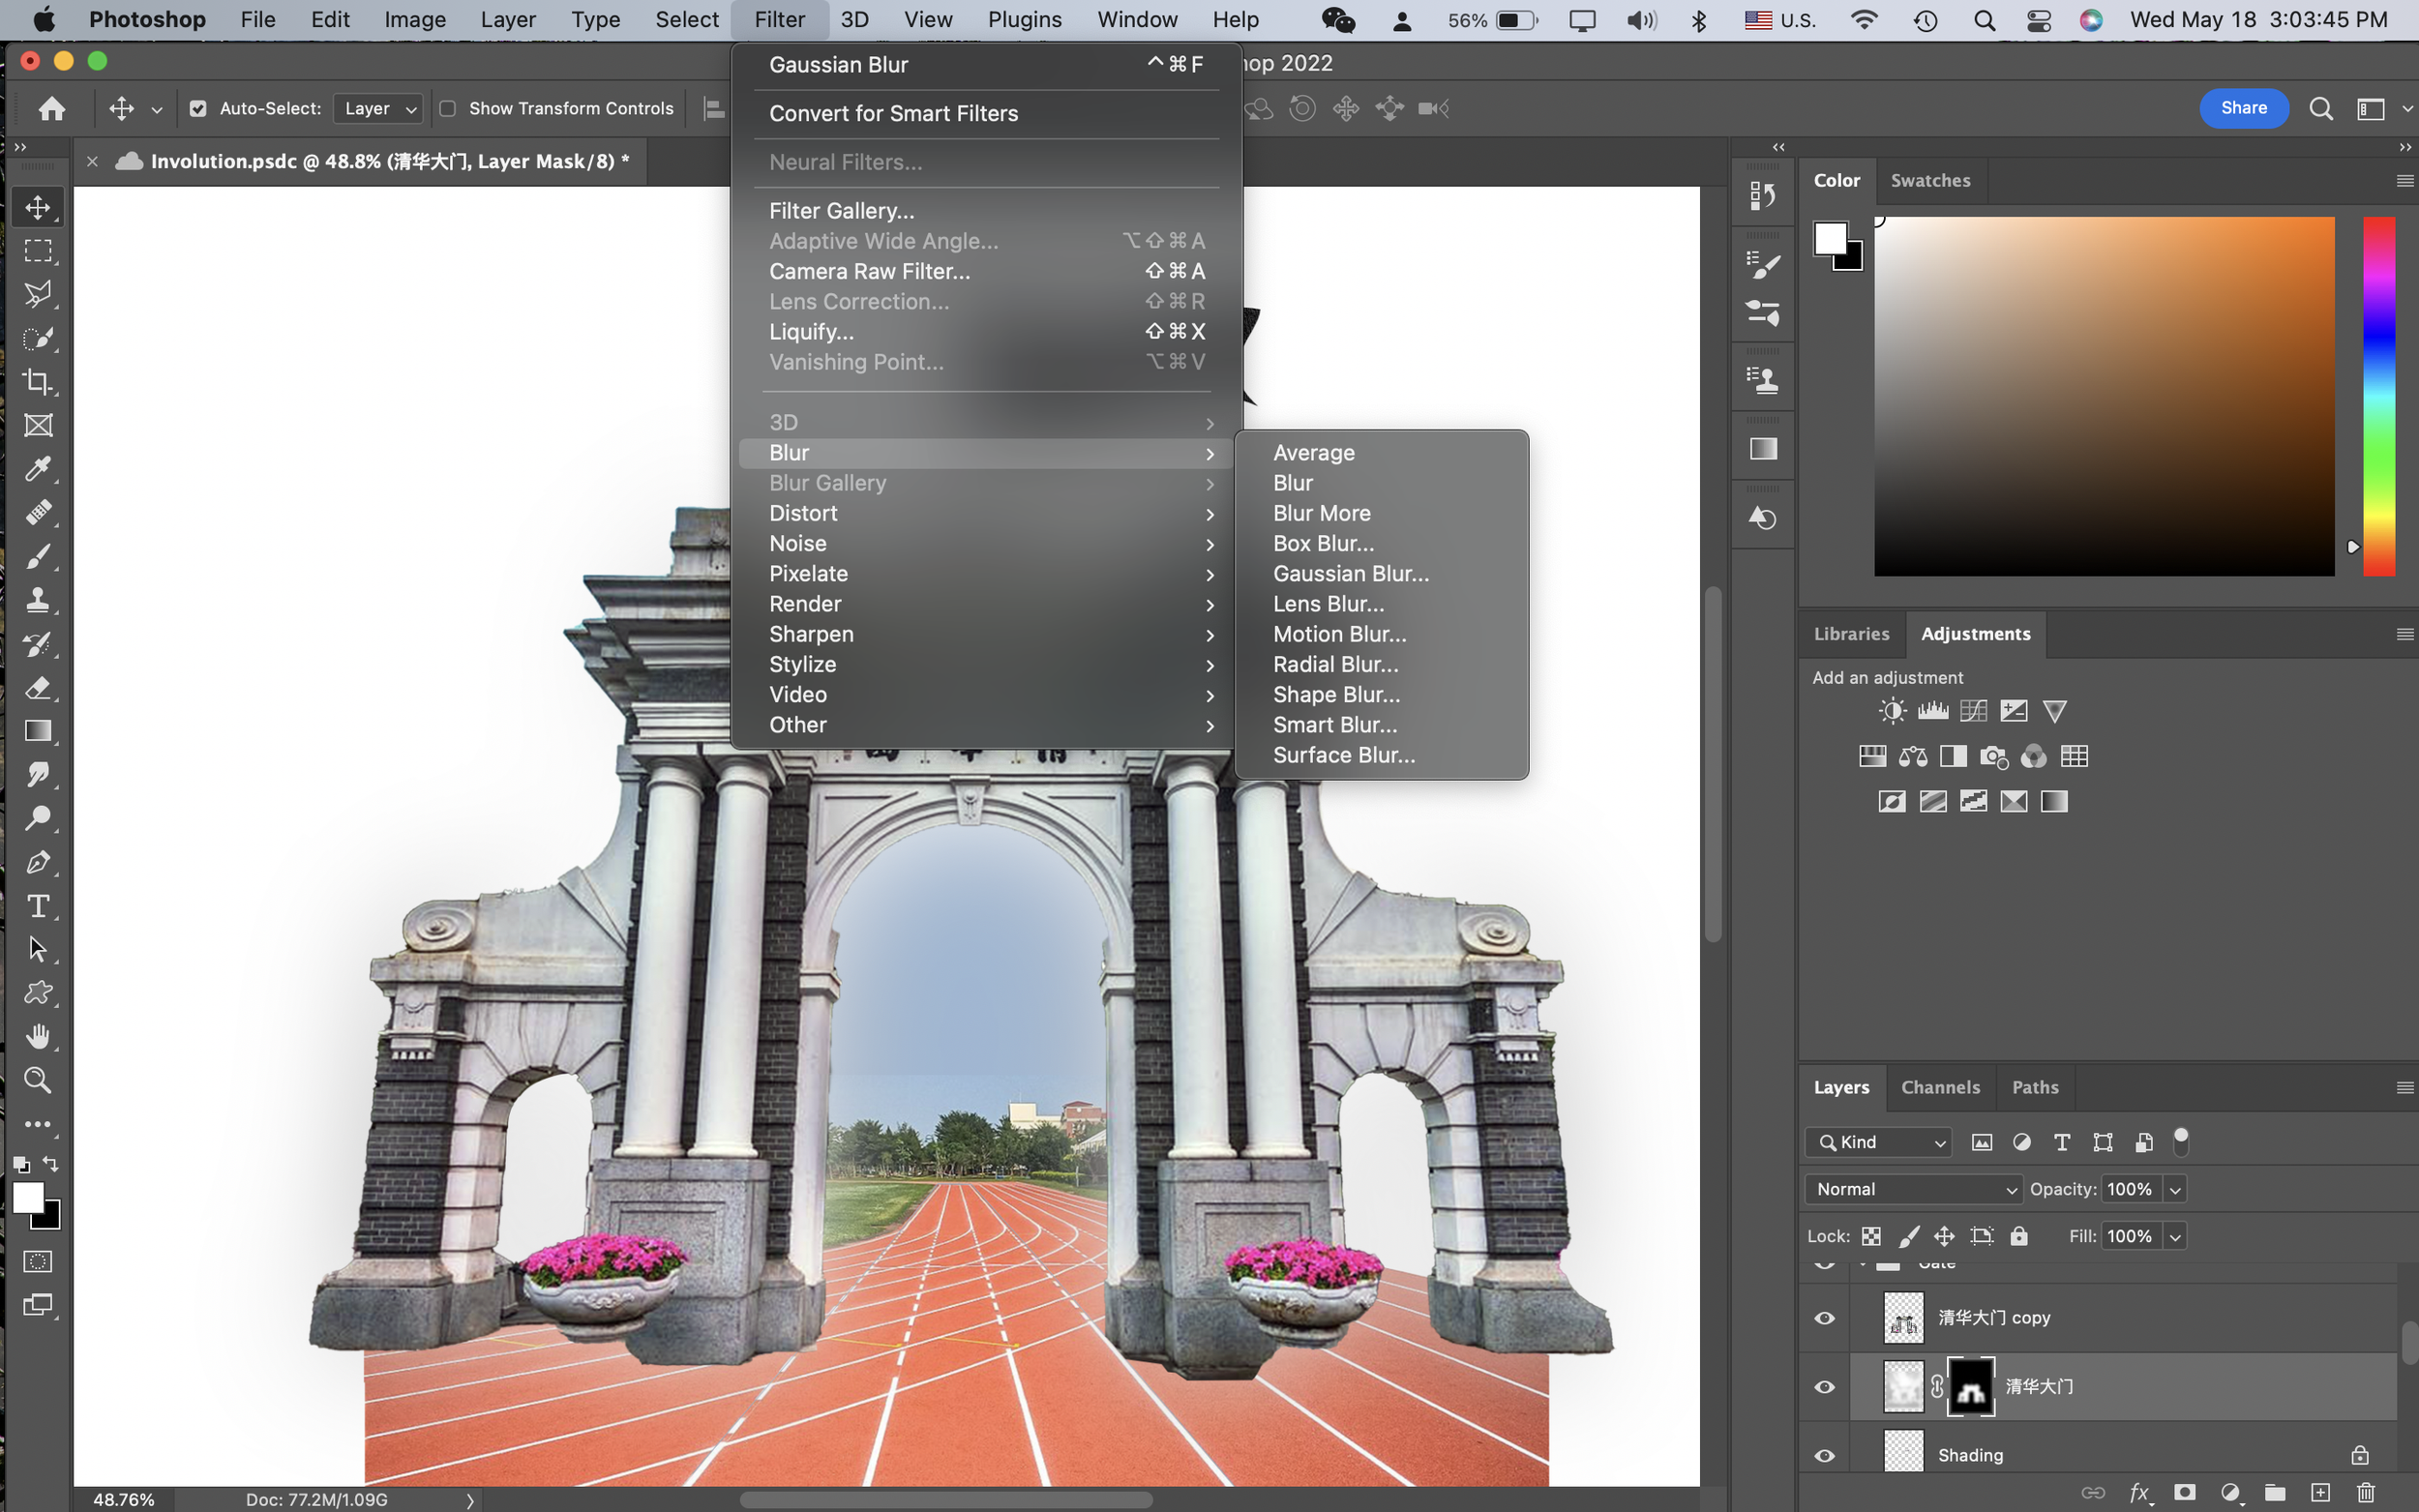
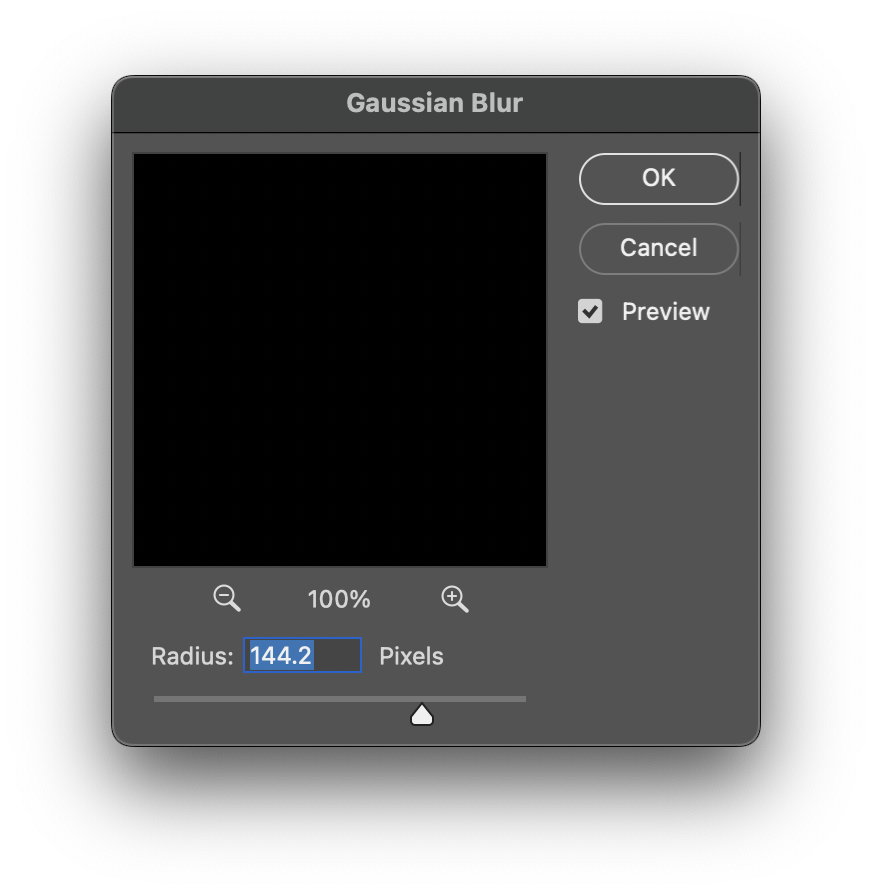
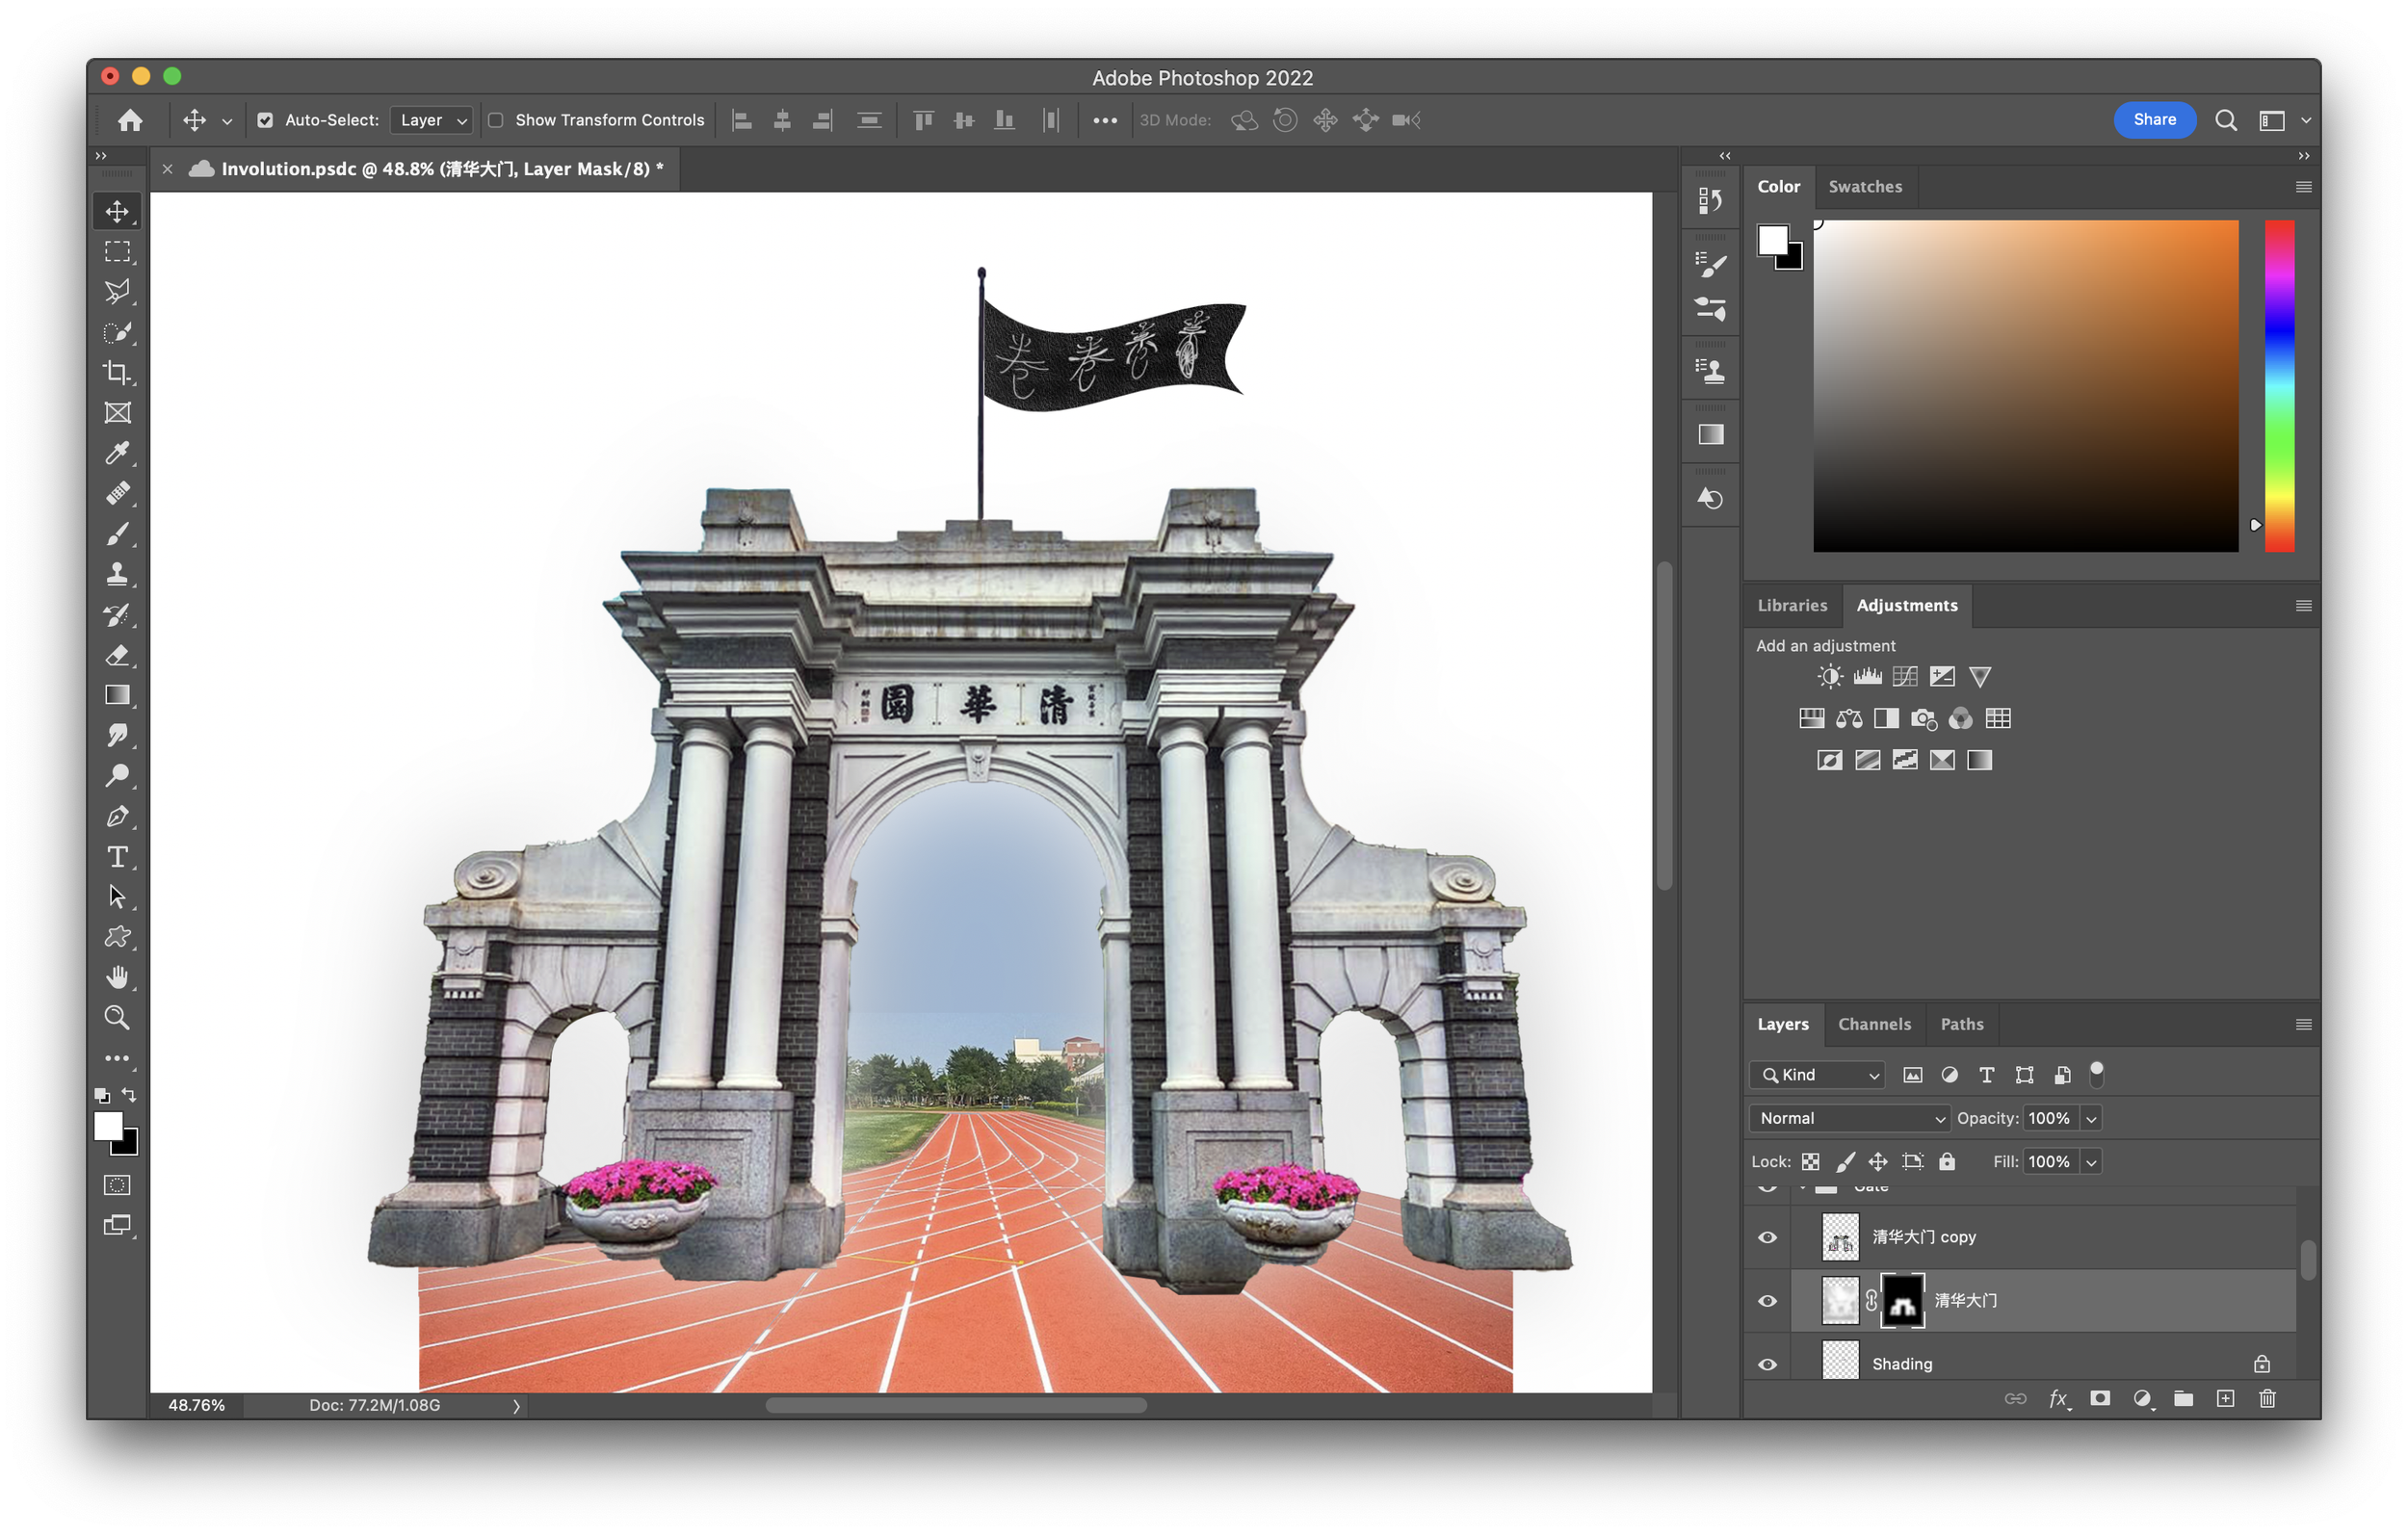
To emphasize certain elements of the collage, you can create a halo effect by following these steps. First, make a duplicate layer. Make sure the duplicate layer is selected and then click on filter > blur > gaussian blur. Adjust the pixel radius slider depending on how pronounced you want the effect to be. Create a layer mask and brush away areas where you don’t want to halo to appear. Lastly, drag the duplicate below the original layer.
Other Tips and Common Pitfalls
Since you’ll most likely be working with lots of layers, organization is key. Use folders to group layers together for ease of edit. I divided the 135 layers that compose this collage into 12 visual grids.
Pay attention to which layer is selected. Not all layers will be visible at the same time, so make sure that you’re making edits on the intended layer. 9 times out of 10 when I thought photoshop was malfunctioning I simply didn’t have the right layer selected. Keep in mind that once the file has been saved you can’t revert back to earlier versions.
Don’t make a collage for the sake of making a collage. Putting random pictures together often result in a melting pot of distracting, discordant visuals. Try to thread images together with common themes, shapes, colors, etc. Use the collage to guide the viewers through a narrative.


