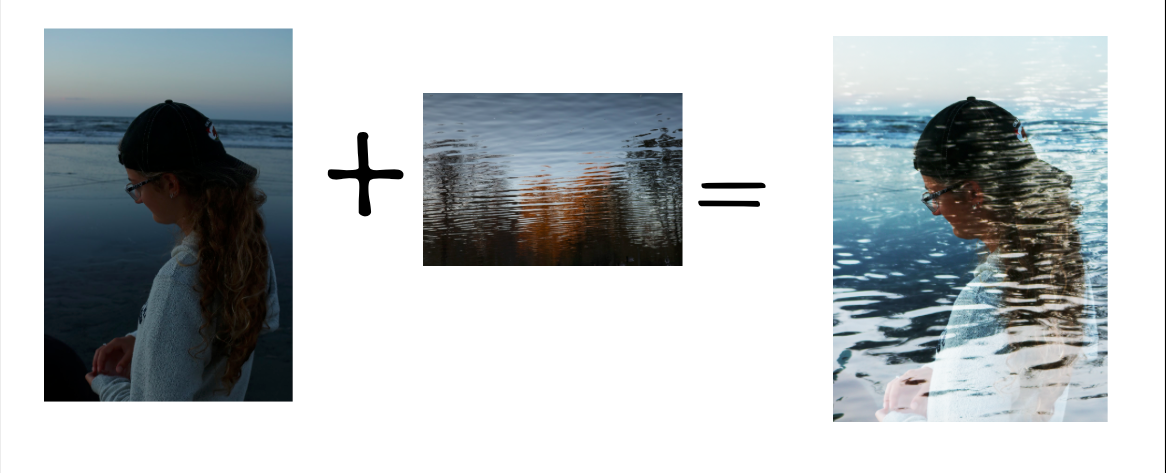
Using double exposure is a great way to add unique perspectives and styles to your photos. By combining two photos into one, you are able to create a scene that is not visible through the human eye. In this tutorial I will be using Adobe Photoshop CC 2019. All you will need for the following project is Adobe Photoshop and any photos you believe may work well together.
Step One: Choose two photos that you think may work well together
Choosing photos for this project may seem challenging at first, but in reality it is just a process of experimentation.
Some helpful tips for choosing two photos to combine include:
Think about which photo you want to be the the first layer and which photo you want in front
I really liked this photo of the subject walking on the beach, but wanted to make it more unique through overlay. Therefore, I choose this photo to be my first layer..
When picking the photo you will put in front of the background, it works best to pick a photo without a harsh background and with light colors. When planning what I wanted the final project to look like, I wanted the birds added to my beach picture. Since the background behind the birds is relatively light and neutral, and the birds are a dark color, the photo was easy to combine with my first layer.
Step Two: Open Photoshop and create a new page
Open up your Photoshop application and click on the ‘Create New’ button.
On the right side of the screen, you can change the title, orientation, and dimensions of your document. Select and Adjust the settings you want and then hit the ‘Create’ button in the bottom right to open the document.
To create my photo, I choose to stick with the default photoshop size.
Step Three: Add your first photo to the document
Drag and drop the image you would like as the first layer of your overlay into the Photoshop window from your desktop.
Adjust the size of the photo and how it fills the document by pulling the corners of the photo to make it bigger or smaller.
When you are happy with the placement of your photo, hit the ‘Enter’ key.
Step Four: Add Your Second Photo to the Document
Just as you did in Step 2, drag and drop the image that you would like to be the second layer of the overlay into the Photoshop window from your desktop.
Step Five: Change the Opacity of the Second Photo to Help with Positioning
Before adjusting the size and position of the second photo, it will be helpful to change its opacity. The opacity of something is its condition of lacking transparency or translucence. Since you have changed the opacity, you can adjust the size and position of the photo based on how it will look overlayed onto the background.
In the bottom right of the screen, there is an ‘Opacity’ option where you can adjust how see-through the photograph is.
100% = very opaque (you can’t see through it)
50% = fairly transparent (you can see both the background photo and a faded version of the top layer photograph)
Now, adjust the size of the photo and how it fills the document by pulling the corners of the photo to make it bigger or smaller.
In this case, I stretched the photo and moved it around a bit until I was satisfied with the position of the birds.
When you are happy with the placement of your photo, hit the ‘Enter’ key.
Step Six: Play around with the way in which you would like your photos to interact and choose a setting
In the bottom corner directly next to the Opacity settings, there will be a drop down menu where you can choose how you would like the two photos to interact.
Go through the settings and experiment with how they affect your photo.
TIP: it may help you turn your opacity to 100% when trying the different options.
I chose to use the ‘Darken’ option at 100% opacity as it made the birds sharper and added contrast to my picture.
Here are a few examples of other overlay settings:
Step Seven: Edit your photo and add final touches
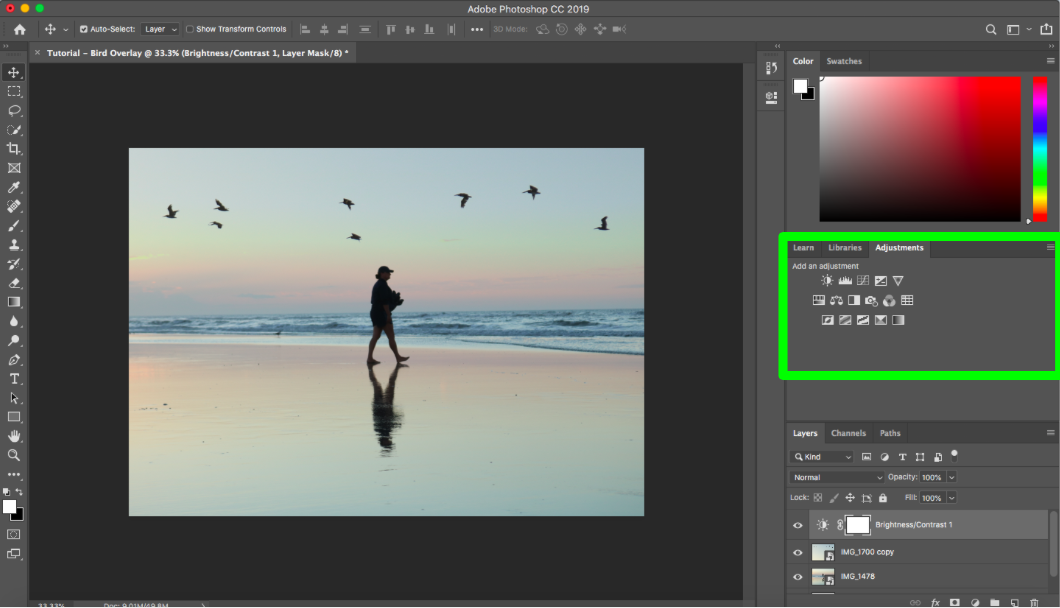
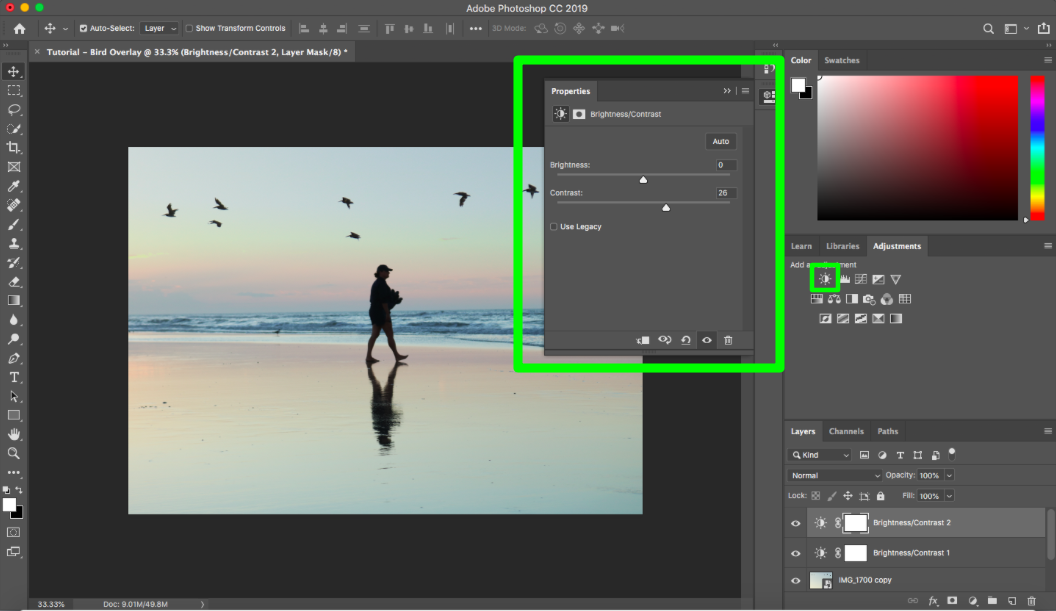
On the left hand side of the Photoshop window, there are settings that allow you to adjust the brightness, contrast, saturation, exposure, and more.
Don’t hesitate to try new things and experiment with different editing styles. If you make a mistake, or want to reverse the change you made, click the ‘History’ icon to be able to delete previous changes or view the edits you have made on your photo.
Step Seven: Save your photo
Go to ‘File’ and then select ‘Save As’. Make sure that you are saving the image as a JPEG by selecting that in the Format section.
Creating Overlay photos is all about creativity, imagination, and experimentation. It never hurts to try to combine two photos together and see where it leads you.
There are not many things that can go wrong during this tutorial. If two photos don’t end up working together do not get frustrated and try your best to keep experimenting.


